Author

Pure Garden

Browsing

Combining cloves, lemon, and onion creates a potent blend that offers numerous health benefits and practical uses around the home. Here’s how this natural trio can enhance your well-being and daily life:​

Health Benefits

  1. Immune Support: Lemons are rich in vitamin C, which boosts the immune system, while cloves contain antioxidants that combat oxidative stress.

  2. Digestive Aid: Onions provide prebiotics that support gut health, and cloves have been traditionally used to alleviate digestive discomfort.

  3. Anti-Inflammatory Properties: The compounds in cloves and onions possess anti-inflammatory effects, which may help reduce inflammation in the body.

Home Uses

  • Natural Air Freshener: Piercing a lemon with cloves creates a fragrant air freshener that also acts as an insect repellent.

  • Air Purification: Placing sliced onions around the home is believed to purify the air by absorbing bacteria and viruses.

Culinary Applications

Incorporating cloves, lemon, and onion into your cooking can enhance the flavor profile of various dishes. For example, adding a clove-studded onion to soups or stews imparts a warm, aromatic depth, while a squeeze of lemon brightens the overall taste.

Dates, often referred to as nature’s candy, are not only delicious but also packed with nutrients that offer a multitude of health benefits. Whether consumed fresh or dried, these sweet fruits can be a valuable addition to your diet.

Nutritional Profile of Dates

Dates are rich in essential vitamins and minerals, including potassium, magnesium, vitamin B6, and iron. They are also high in fiber and antioxidants, making them a nutritious choice for snacking or incorporating into various dishes

Health Benefits of Dates

  1. Digestive Health: The high fiber content in dates aids in promoting regular bowel movements and preventing constipation.

  2. Natural Energy Boost: Dates provide natural sugars like glucose and fructose, offering a quick and sustained energy source, making them ideal for pre- or post-workout snacks.

  3. Antioxidant Properties: Rich in antioxidants such as flavonoids, carotenoids, and phenolic acid, dates help combat oxidative stress and may reduce the risk of chronic diseases.

  4. Heart Health: Regular consumption of dates may support heart health by helping to regulate blood pressure and cholesterol levels.

  5. Bone Health: Containing minerals like calcium and phosphorus, dates contribute to maintaining strong and healthy bones.

  6. Brain Function: Some studies suggest that dates may support brain health and reduce the risk of neurodegenerative diseases.

Incorporating Dates into Your Diet

Dates are versatile and can be enjoyed in various ways:

  • As a Snack: Enjoy them on their own for a sweet and nutritious treat.

  • In Smoothies: Blend dates into smoothies for added natural sweetness and nutrients.

  • In Baking: Use dates as a natural sweetener in baked goods, reducing the need for refined sugars.

  • With Salads: Chop dates and add them to salads for a hint of sweetness and texture.

Growing peanuts at home is a rewarding and sustainable way to enjoy fresh produce. By utilizing recycled plastic containers, you can cultivate peanuts even in limited spaces. Here’s a step-by-step guide to get you started:​

Materials Needed:

  • Recycled plastic containers (minimum 12 inches deep) with drainage holes

  • Raw peanut seeds (preferably from a garden center)

  • High-quality potting mix

  • Organic compost

  • Perlite or vermiculite (for improved drainage)

  • Watering can or hose with a gentle spray

  • Balanced NPK fertilizer

  • Mulch (such as straw or leaves)

  • A location that receives full sunlight

Step-by-Step Guide:

  1. Selecting the Right Containers: Choose recycled plastic containers that are at least 12 inches deep to accommodate the peanut plants’ root systems. Ensure the containers have drainage holes to prevent waterlogging.

  2. Preparing the Potting Mix: Create a well-draining soil mixture by combining equal parts potting mix, organic compost, and perlite or vermiculite. This blend provides essential nutrients and proper aeration for healthy plant growth.

  3. Planting Peanut Seeds: Fill the containers halfway with the prepared potting mix. Plant the peanut seeds 1 to 2 inches deep and space them 4 to 6 inches apart. Cover the seeds with additional potting mix, leaving some space at the top of the container for watering.

  4. Watering: After planting, water the soil thoroughly to ensure even moisture distribution. Maintain consistent soil moisture, especially during flowering and pod development, but avoid overwatering to prevent root rot.

  5. Providing Sunlight: Place the containers in a location that receives at least 6 to 8 hours of direct sunlight daily. Peanuts thrive in warm, sunny conditions.

  6. Fertilization: Apply a balanced NPK fertilizer every 3 to 4 weeks during the growing season, following the manufacturer’s instructions. Avoid excessive nitrogen, as it can promote foliage growth over peanut production.

  7. Managing Growth: As the plants grow, they will produce yellow flowers that develop into pegs, which penetrate the soil to form peanuts. Gently mound additional soil around the base of the plants to support this process.

  8. Mulching: Apply a layer of mulch around the plants to retain soil moisture, suppress weeds, and regulate soil temperature.

  9. Harvesting: Peanuts are ready to harvest when the plants begin to yellow and the leaves dry out, typically 120 to 150 days after planting. Carefully dig up the plants and shake off excess soil. Allow the peanuts to dry in a warm, well-ventilated area for about two weeks before removing them from the shells.

  10. Storing and Enjoying: Once dried, store the peanuts in a cool, dry place in airtight containers. Roast or boil them before consuming for optimal flavor.

By following these steps, you can successfully grow peanuts at home using recycled plastic containers, contributing to sustainability while enjoying fresh, homegrown produce.

Facebook Captions:

  1. Ever thought about growing your own peanuts at home? With just a recycled plastic container and a few simple steps, you can enjoy fresh peanuts straight from your garden!

  2. Transform your balcony or patio into a mini peanut farm using recycled materials. It’s easier than you think!

  3. No backyard? No problem! Learn how to cultivate peanuts in recycled plastic containers and enjoy a sustainable snack.

  4. From planting to harvesting, discover the joy of growing peanuts at home with our beginner-friendly guide.

  5. Turn everyday plastic waste into a productive peanut-growing container. Start your sustainable gardening journey today!

If you’re heading away for a few weeks or just want a hands-off way to keep your garden hydrated, there’s a clever trick that uses something you already have at home. With just a plastic bottle and a little setup, you can keep your plants watered for up to a month without buying any fancy tools.

This method works great for both outdoor and potted plants and can be set up in just a few minutes.

What you’ll need

  • One empty plastic bottle (like a 1.5 or 2-liter soda bottle)

  • A sharp object like a needle, nail, or small screwdriver

  • Water

  • A shovel or trowel (for outdoor use)

How to make your DIY slow-drip irrigation

  1. Take your clean plastic bottle and poke a small hole about 5 to 7 centimeters up from the bottom. You only need one small hole—just enough to let the water drip slowly.

  2. Fill the bottle with water and put the cap back on. You can leave it slightly loose if you want to increase airflow and speed up the drip.

  3. Dig a small hole near the base of your plant, deep enough to bury the bottle upright with the hole below soil level.

  4. Place the bottle in the hole and pack the soil around it tightly. Make sure the hole is facing the plant roots.

  5. Refill the bottle every few weeks, depending on the size of the plant and the heat in your area. In many cases, one full bottle will last up to 2–4 weeks.

Bonus tip

For even longer-lasting moisture, you can add a layer of mulch around the plant to help hold the water in the soil.

This method is perfect for travel, forgetful waterers, or gardeners who want a backup plan during hot weather. It’s cheap, simple, and surprisingly effective.

Growing avocados in containers might seem ambitious, but with the right care and setup, it’s completely doable—even if you don’t live in a tropical climate. Whether you’re starting from seed or using a young tree, this guide will walk you through how to grow a healthy avocado plant in a pot and eventually enjoy your own homegrown fruit.

  1. Germinate the seed

Start by removing the seed from a ripe avocado. Rinse it well, then suspend it over a glass of water using four toothpicks so that only the bottom sits in water. Set it in a warm, bright place and change the water weekly.

After 2 to 4 weeks, you should see roots and a sprout emerging from the top.

  1. Choose the right container

Once your sprouted seed has a few inches of growth, transfer it to a pot at least 10–12 inches wide with drainage holes. Avocados hate soggy roots, so good drainage is essential.

Use a mix of potting soil and perlite or sand to keep it loose and well-draining.

  1. Give it warmth and light

Avocados love the sun. Place your potted tree in a bright spot that gets 6–8 hours of light daily. If you live in a cooler area, bring the pot indoors when temps drop below 50°F (10°C).

  1. Water just enough

Keep the soil moist but never soggy. Let the top inch dry out between waterings. Overwatering is one of the biggest mistakes new avocado growers make.

  1. Feed and prune

Feed with a balanced fertilizer during spring and summer. You can also use compost or worm castings for a gentle, organic boost.

When the plant reaches about 24 inches tall, pinch the top leaves to encourage side branches. This makes the plant fuller and more productive over time.

  1. Be patient

Growing avocados from seed can take 3–5 years (or more) to bear fruit, and not all will produce. For faster results, start with a grafted avocado tree from a nursery—it’s already set up to produce fruit and can start within 1–2 years under the right conditions.

With patience and a little care, growing avocados in pots is not only possible—it’s incredibly satisfying. Whether or not you get fruit, you’ll still have a beautiful, lush tree that adds life to your home or patio. And if it does bear fruit? Even better.

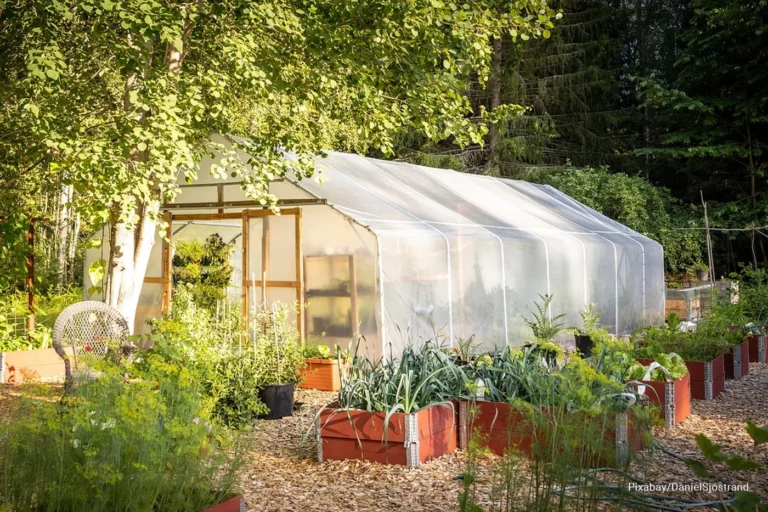
Want to grow fresh food even when it’s freezing outside? An underground greenhouse—also known as a walipini—makes that possible. It uses the earth’s natural insulation to trap heat and create a stable growing environment, even in winter.

If you’ve got a little space and a big love for gardening, this DIY project could turn your backyard into a year-round harvest zone. Here’s how to get started.

What is an underground greenhouse?

An underground greenhouse is a sunken structure that uses the warmth of the earth and passive solar heating to maintain a consistent temperature. It’s typically dug 4 to 6 feet into the ground, with a transparent roof angled to the sun. It protects plants from frost, wind, and temperature swings.

Why build one?

  • Lets you grow fresh produce all year, even in cold climates

  • Uses less energy than heated greenhouses

  • Protects crops from harsh weather and pests

  • Cuts down on grocery bills

  • Built right, it can last for decades

Where to build it

Choose a spot with full sun exposure—ideally facing north-south to catch maximum light in winter. A natural slope or hillside makes the digging easier, but you can also build it on flat ground.

Basic design elements

  • Depth: Dig down about 6 feet or more, depending on your climate

  • Roof angle: Use a slanted roof made from clear plastic, polycarbonate, or greenhouse film

  • Back wall: Can be packed earth, stone, or insulated to reflect heat back inside

  • Front wall: Should be low to allow maximum sunlight through the angled roof

  • Ventilation: Add vents or a solar fan to control humidity and prevent overheating on sunny days

  • Drainage: Make sure the base has a slight slope and gravel or drain pipe to prevent flooding

Materials you’ll need

  • Shovels or digging equipment

  • Lumber or masonry for framing

  • Clear polycarbonate or greenhouse plastic

  • Rebar or supports for the roof structure

  • Insulation (optional, for colder regions)

  • Vents or windows for airflow

  • Gravel or sand for the base

Tips for success

  • If your soil is heavy or clay, reinforce the walls to prevent collapse

  • Use thermal mass (like barrels of water or bricks) to absorb and release heat at night

  • Add raised beds for easier access and better drainage

  • Watch for moisture buildup—ventilation is key

  • You can plant in-ground or use containers depending on your setup

What you can grow year-round

Cool-season greens like spinach, lettuce, kale, and Swiss chard thrive in underground greenhouses. Root veggies like carrots and beets also do well. In spring and summer, you can grow everything from tomatoes and peppers to herbs and melons.

An underground greenhouse gives you total control over your growing space, no matter the weather outside. It takes some effort to build, but once it’s set up, the payoff is huge. Fresh food in January? Yes, please.

Growing saffron at home might sound complicated, but it’s actually pretty simple—and you don’t need a garden to do it. With the right setup and timing, you can grow your own saffron in containers right on your balcony, patio, or windowsill.

Saffron comes from the Crocus sativus flower, and each bloom gives you just three red stigmas—the actual saffron threads. It’s one of the most valuable spices in the world, and growing your own makes every harvest feel like gold.

Choosing the right container

Use a pot that’s at least 6 inches deep with good drainage holes. Clay or terracotta pots are ideal because they help the soil dry evenly and prevent rot. Each pot should be wide enough to space out multiple bulbs.

Prepping your soil

Saffron needs well-draining soil. Mix two parts quality potting soil with one part coarse sand or perlite. The goal is to avoid soggy roots while giving the corms enough nutrients and airflow.

When and how to plant

Plant saffron corms in late summer or early fall. Set them pointy end up, about 4 inches deep, and space them 3 inches apart. This gives them room to breathe and develop strong roots.

Where to place your containers

Put your pots in a spot that gets 6 to 8 hours of full sun every day. If you live in a hot climate, a little afternoon shade helps prevent overheating. Indoors near a bright window or outside on a sunny patio both work great.

Watering and feeding

Water just enough to keep the soil lightly moist. Don’t overwater—soggy soil can cause bulb rot. Once green shoots appear, keep watering when the top inch of soil feels dry. At the beginning of the season, you can feed with a mild, balanced fertilizer to help fuel growth.

When and how to harvest

Flowers bloom for only a couple of weeks in the fall. Check your plants daily, and as soon as a flower opens, pluck the three red stigmas using tweezers. Dry the threads gently on a paper towel and store them in an airtight jar away from light.

After the bloom

After flowering, the leaves will keep growing for a few months and then turn yellow. That’s your sign the plant is going dormant. Cut back on watering and let the corms rest. If winters get harsh in your area, bring the pots indoors or move them to a sheltered spot.

Every year or two, dig up the corms, separate the smaller ones, and replant them with fresh soil. This keeps the plants productive and prevents overcrowding.

Saffron might be one of the world’s rarest spices, but that doesn’t mean it’s out of reach. With a few pots, good soil, and some patience, you can grow your own stash of homegrown saffron right at home.

For generations, simple ingredients like orange peel and clove were used to make powerful home remedies. Today, many of those traditions have been replaced with pills and packaged supplements—but some of those old methods are worth bringing back.

One of those forgotten gems is the orange peel and clove elixir. This blend is more than just a comforting aroma—it’s a time-tested combination of natural ingredients that can support digestion, fight inflammation, and boost overall wellness. And the best part? It’s easy to make with stuff you probably already have at home.

Why orange peel?

Orange peel contains natural compounds like flavonoids and vitamin C that support immune health, reduce oxidative stress, and aid digestion. It’s also a gentle way to help the body detox and ease nausea or bloating.

Why cloves?

Cloves are rich in eugenol, a natural compound known for its antibacterial, antiviral, and anti-inflammatory properties. They’ve been used traditionally to ease toothaches, relieve indigestion, and even support circulation.

What does this elixir help with?

  • Soothes digestion and bloating

  • Supports the immune system

  • May help reduce inflammation

  • Acts as a mild decongestant

  • Provides a warm, calming effect

How to make the orange peel and clove elixir

Ingredients:

  • 1–2 organic orange peels (fresh or dried)

  • 4–6 whole cloves

  • 2 cups of water

  • Optional: cinnamon stick or small piece of fresh ginger

Steps:

  1. Add the water, orange peels, and cloves to a small pot.

  2. Bring to a gentle boil, then reduce heat and simmer for 10–15 minutes.

  3. Strain and pour into a cup. You can sweeten it with raw honey if desired.

  4. Sip warm, especially after meals or when you’re feeling run-down.

When to use it

  • After meals to support digestion

  • In the evening as a relaxing herbal drink

  • When you feel a cold or congestion coming on

  • During stressful days as a calming ritual

There’s something powerful about returning to simple, natural remedies. The orange peel and clove elixir is a perfect example—a comforting, easy-to-make wellness drink that brings together flavor, tradition, and healing. Sometimes the old ways really are the best.

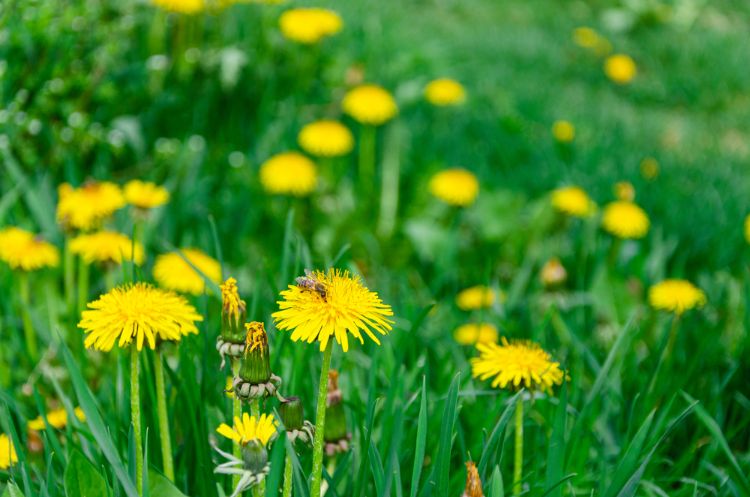
Most people think of dandelions as annoying little weeds scattered across lawns and sidewalks. But behind those fluffy yellow blooms is something even more valuable hiding underground—the root. Dandelion roots are the real MVP of this plant, packed with nutrients and medicinal benefits that have been used for centuries.

So before you pull up your next dandelion, here’s why you might want to hang on to that root.

What’s in a dandelion root?

Dandelion roots are rich in natural compounds that support the liver, digestion, immune health, and more. They contain:

  • Inulin (a prebiotic fiber)

  • Bitter compounds that stimulate digestion

  • Vitamins A, C, and K

  • Minerals like potassium, iron, and calcium

  • Antioxidants and anti-inflammatory agents

These roots have long been used in herbal medicine to detoxify, cleanse, and nourish the body from the inside out.

Top health benefits of dandelion roots

  1. Supports liver function
    Dandelion root is known as a natural liver tonic. It helps the liver flush out toxins more efficiently and may improve bile production, which supports digestion.

  2. Aids digestion and gut health
    The inulin in dandelion root acts as a prebiotic, feeding healthy gut bacteria. It also helps relieve bloating and sluggish digestion.

  3. Natural detox support
    Traditionally, dandelion root has been used in cleansing remedies to help the body eliminate waste and reset the system.

  4. Balances blood sugar
    Some research shows that dandelion root may help regulate blood sugar levels and improve insulin sensitivity.

  5. Anti-inflammatory and antioxidant
    Its compounds may help fight inflammation, protect cells from oxidative stress, and reduce the impact of chronic conditions.

  6. Diuretic and kidney support
    Dandelion root may act as a gentle diuretic, helping the body flush excess fluids and supporting kidney health.

How to use dandelion root

  • Tea: Dry and chop the root, then simmer in water for 10–15 minutes. Drink as a detox or digestive tea.

  • Roasted: Roast the dried root and brew it like a coffee alternative.

  • Tincture: Dandelion root extract is available at many natural health stores.

  • Powder: Add it to smoothies or wellness drinks.

  • Fresh: Wash, chop, and cook like any root vegetable (especially in soups or broths).

Tips before using

  • Always harvest roots from chemical-free areas.

  • Wash thoroughly and dry well if storing.

  • If you’re taking medications or have kidney/liver conditions, check with a healthcare provider before using regularly.

The next time you see a dandelion, think twice before pulling it out and tossing it. The root is where the real healing power lies. From liver detox to gut support and beyond, this humble little weed has a lot more going on than meets the eye.

Nettles often get a bad rap. They sting, they spread fast, and they’re usually the first plant people pull out of the garden. But what if you could turn those weeds into something useful?

Turns out, stinging nettles are packed with nutrients and natural compounds that make them perfect for homemade fertilizer and insect repellent. If you’re looking for a free, organic way to feed your plants and keep bugs off your garden, nettles are about to become your new best friend.

Why use nettles in the garden?

Nettles are rich in nitrogen, iron, magnesium, and trace minerals. When you turn them into a liquid fertilizer, you’re basically creating a plant-powered nutrient boost for your soil. Plus, their strong smell and compounds make a great natural bug deterrent.

Two ways to use nettles

  1. Nettle fertilizer (also called nettle tea)
    This is a fantastic liquid feed for your plants—especially leafy greens and nitrogen-loving veggies like tomatoes, cucumbers, and squash.

How to make it:

  • Gather a bucket full of fresh nettle leaves (gloves on!)

  • Chop them up and stuff them into a large bucket

  • Fill with water (rainwater is ideal) until the leaves are covered

  • Let it sit in a shaded spot for 1 to 2 weeks, stirring every day

  • It will smell pretty strong once ready—strain the liquid and use it diluted at a 1:10 ratio with water

How to use it:

  • Pour around the base of plants as a root drench

  • Use once a week during the growing season

  1. Nettle insecticide spray
    Nettles also contain formic acid and silica, which help deter aphids, spider mites, and other soft-bodied pests.

How to make it:

  • Simmer a handful of chopped nettle leaves in 1 liter of water for 15 minutes

  • Let it cool, then strain the liquid into a spray bottle

How to use it:

  • Spray directly onto affected leaves in the morning or evening

  • Use every few days or after rain to keep pests away

Extra tips for success

  • Only harvest nettles before they flower—after that, they become tough and less effective

  • Always wear gloves when handling fresh nettles

  • Add leftover plant material to your compost bin for an extra nutrient boost

Instead of fighting nettles in your yard, start using them to your advantage. They’re free, organic, and incredibly effective. Whether you’re feeding your tomatoes or fending off aphids, nettle fertilizer and spray are simple, sustainable solutions that actually work.