Author

Pure Garden

Browsing

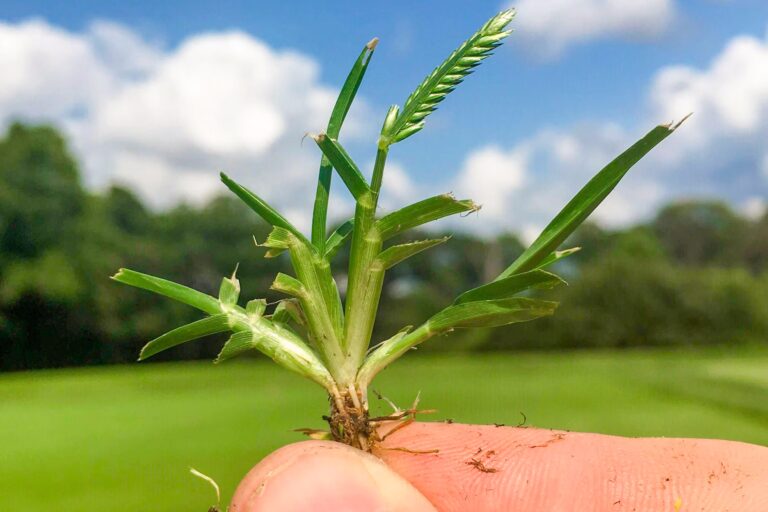
Goose grass (also known as cleavers or Galium aparine) is a common weed with surprising health benefits. When prepared as tea, it offers a refreshing, detoxifying drink packed with nutrients. Here’s how to make it properly.

Why Drink Goose Grass Tea?

This humble plant offers several benefits:

  • Natural detoxifier that supports lymphatic drainage
  • Rich in vitamin C and antioxidants
  • May help with urinary tract health
  • Traditionally used to soothe skin conditions
  • Contains silica for hair and nail strength

Harvesting Goose Grass

Best time to pick: Early spring when plants are young and tender (before flowering)
What to look for:

  • Bright green, sticky leaves
  • Square stems with small hooks
  • Grows in shady, moist areas
    Avoid:
  • Plants near roads or sprayed areas
  • Flowering/mature plants (more bitter)

Simple Goose Grass Tea Recipe

Ingredients:

  • 1 cup fresh goose grass (leaves and stems)
  • 4 cups filtered water
  • Optional: honey, lemon, or mint to taste

Preparation Method:

  1. Clean thoroughly: Rinse plants under cool water to remove dirt and insects
  2. Chop roughly: Cut into 1-inch pieces to release more flavor
  3. Cold infusion (best for nutrients):
    • Place herbs in jar
    • Cover with room temperature water
    • Steep 4-8 hours (or overnight)
    • Strain and drink chilled
  4. Hot tea (traditional method):
    • Bring water to near-boil (180°F)
    • Add herbs and steep 5-10 minutes
    • Strain and enjoy warm

Tips for Best Results

  • Drink within 24 hours for maximum benefits
  • Start with small amounts (½ cup) to test tolerance
  • Best consumed in morning or early afternoon
  • Combine with mint or lemon balm for improved flavor
  • Can be frozen in ice cube trays for later use

Possible Side Effects

While generally safe, some people may experience:

  • Mild diuretic effect
  • Allergic reaction (rare)
  • Digestive upset if consumed in excess

Storing Goose Grass

  • Fresh: Keeps 2-3 days in fridge (wrap in damp cloth)
  • Dried: Hang bundles upside down in airy space for 1-2 weeks
  • Frozen: Blanch briefly, then freeze in portions

Final Thoughts

Goose grass tea is an easy way to harness the power of this often-overlooked plant. With its fresh, slightly grassy flavor and numerous health benefits, it’s worth trying as a spring tonic or regular detox drink.
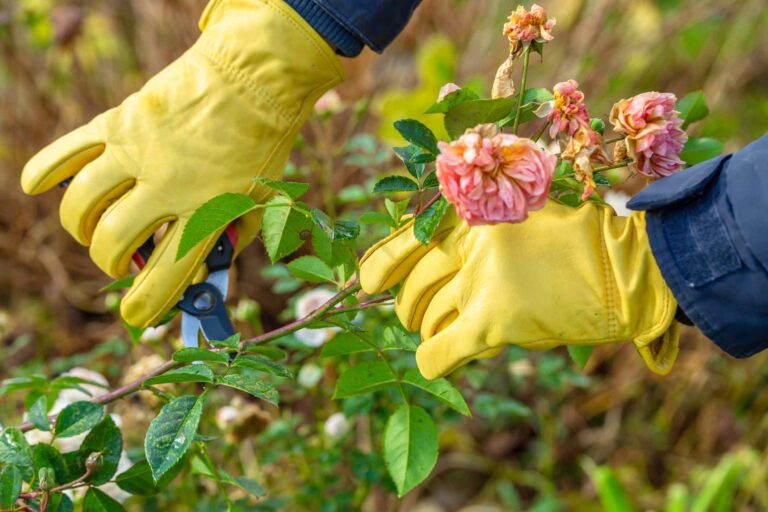
Pruning rose bushes is essential for healthy growth, abundant blooms, and disease prevention. But improper pruning can harm your plants. This easy guide covers when to prune roses and exactly how to do it for stunning results.


Why Pruning Roses Matters

✔ Encourages new growth – More blooms, stronger stems
✔ Improves air circulation – Reduces fungal diseases
✔ Shapes the plant – Prevents overcrowding and legginess
✔ Removes dead/diseased wood – Keeps the plant healthy


Best Time to Prune Roses

1. Most Roses (Hybrid Teas, Floribundas, Grandifloras)

✂ Late winter/early spring (when new buds swell but before leaves open).
✂ Avoid pruning in fall—it can trigger new growth that winter frost will damage.

2. Climbing Roses

✂ After first bloom (early summer) to shape and remove old canes.

3. Old Garden Roses & Once-Blooming Varieties

✂ Prune after flowering (summer) since they bloom on old wood.

4. Repeat-Blooming Shrub Roses

✂ Light pruning in early spring, then deadhead spent blooms.


Tools You’ll Need

  • Sharp bypass pruners (clean cuts, less damage)
  • Loppers (for thick canes)
  • Gloves (thorn-proof!)
  • Disinfectant (rubbing alcohol or bleach solution to sterilize tools)

Step-by-Step Pruning Guide

Step 1: Remove Dead, Damaged, or Diseased Wood

  • Cut back to healthy, green wood.
  • Dispose of diseased clippings (don’t compost).

Step 2: Thin Out Weak Growth

  • Eliminate spindly, crossing, or inward-growing branches.
  • Keep 3-5 strong, outward-facing canes for an open center.

Step 3: Shape the Bush

  • Hybrid Teas: Cut back to 12-18 inches for large blooms.
  • Shrub Roses: Trim lightly to maintain natural form.
  • Climbers: Keep main canes, trim side shoots to 2-3 buds.

Step 4: Make Clean Cuts

  • Cut ¼ inch above an outward-facing bud at a 45-degree angle.
  • Avoid flat cuts—they trap moisture and encourage rot.

Step 5: Clean Up & Feed

  • Remove all clippings to prevent disease.
  • Apply balanced fertilizer or compost to boost new growth.

Common Pruning Mistakes to Avoid

❌ Pruning too early (risk of frost damage).
❌ Using dull or dirty tools (spreads disease).
❌ Over-pruning (stresses the plant).
❌ Leaving stubby cuts (invites pests and rot).


Aftercare Tips

✔ Water deeply after pruning.
✔ Mulch to retain moisture and regulate soil temperature.
✔ Monitor for pests/disease—early treatment is key.


Final Thoughts

Proper pruning transforms your roses—more flowers, healthier plants, and fewer problems. Follow these steps, and your bushes will reward you with spectacular blooms all season long.

Ready to prune? Grab your shears and get started!

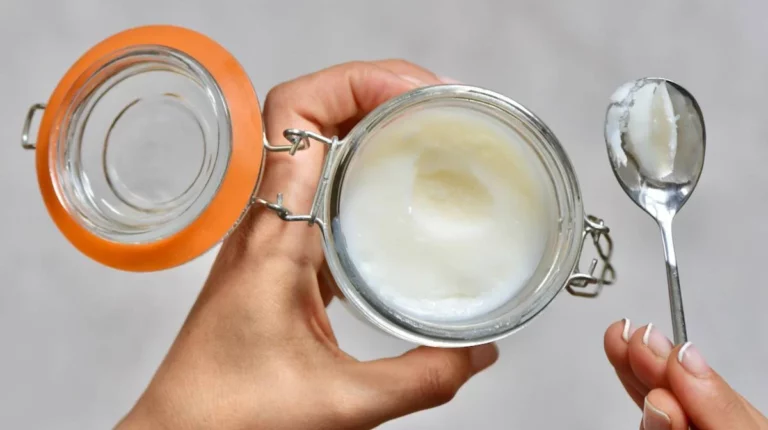
Coconut oil is a versatile staple used in cooking, skincare, and haircare. While store-bought options are convenient, homemade coconut oil is fresher, purer, and free from additives. Best of all, it’s surprisingly easy to make with just one ingredient: fresh coconuts.

Here’s the simplest method to extract pure coconut oil in your own kitchen.

Why Make Coconut Oil at Home?

✔ No preservatives or chemicals – Pure, natural oil
✔ Cost-effective – Cheaper than premium organic brands
✔ Customizable – Control thickness and aroma
✔ Freshness guaranteed – No long shelf-life processing

What You’ll Need

  • 2-3 mature brown coconuts (or 4-5 cups grated coconut)
  • Warm water (for extraction)
  • Blender or grater
  • Cheesecloth or strainer
  • A large bowl and jar (for storage)

(Optional: A slow cooker or saucepan for faster separation.)

Step-by-Step Process

1. Extract the Coconut Meat

  • Crack open the coconuts, drain the water (save it for drinking!), and scoop out the white flesh.
  • Rinse the meat to remove any shell fragments.

2. Grate or Blend the Coconut

  • Traditional method: Grate the coconut finely.
  • Faster method: Blend chunks with a little warm water to make a paste.

3. Make Coconut Milk

  • Mix the grated coconut with 2 cups of warm (not boiling) water.
  • Knead and squeeze with your hands for 5-10 minutes to extract thick, creamy milk.
  • Strain through cheesecloth into a bowl.

4. Separate the Oil from the Milk

  • Cold method (natural separation):
    • Let the milk sit for 24 hours—the cream will rise to the top.
    • Skim off the thick layer and heat it on low until the oil separates.
  • Quick method (heating):
    • Simmer the coconut milk on low heat, stirring occasionally.
    • After 1-2 hours, the water will evaporate, leaving pure oil.

5. Filter and Store

  • Strain the oil through a fine cloth to remove solids.
  • Pour into a clean glass jar and store in a cool, dark place.

Tips for Best Results

 Use mature coconuts – They yield more oil than young ones.
 Low heat is key – High heat can degrade oil quality.
 Unrefined vs. refined – Skip bleaching or deodorizing for a natural, aromatic oil.
 Shelf life – Homemade coconut oil lasts 6-12 months if stored properly.

Uses for Your Homemade Coconut Oil

  • Cooking – Ideal for frying, baking, or adding to smoothies.
  • Skincare – A natural moisturizer for face and body.
  • Haircare – Deep conditioner or frizz tamer.
  • Oil pulling – Promotes oral health.

Final Thoughts

Making coconut oil at home is a rewarding process that ensures purity and freshness. While it takes some time, the result is a chemical-free, multipurpose oil that beats store-bought versions in quality.

Ready to try it? Grab some coconuts and get started!

Most people toss eggshells without realizing they’re a natural calcium powerhouse for plants, pets, and even your home. Here’s why you should stop wasting them—plus 7 brilliant ways to reuse them.

Why Eggshells Are Valuable

✔ 93% calcium carbonate – Strengthens plants, bones, and more
✔ Rich in magnesium & phosphorus – Essential for plant growth
✔ Natural abrasive – Cleans pots, pans, and drains
✔ Pest deterrent – Keeps slugs and snails away

7 Genius Ways to Use Eggshells

1. Garden Fertilizer (Best for Tomatoes & Peppers)

How to use:

  • Crush shells into powder
  • Mix into soil (1 tbsp per plant)
  • Prevents blossom end rot

2. Seed Starters (Biodegradable Pots)

How to make:

  1. Save half-shells
  2. Fill with soil & plant seeds
  3. Transplant directly into garden

3. Chicken & Bird Calcium Supplement

How to serve:

  • Bake shells at 200°F for 10 mins
  • Crush & mix into feed

4. Natural Pest Control

For slugs/snails:

  • Scatter crushed shells around plants
  • Sharp edges deter pests

5. Homemade Toothpaste (Mineral Boost)

Recipe:

  • Blend sterilized shells + coconut oil
  • Adds remineralizing calcium

6. Drain Cleaner (Eco-Friendly)

How to use:

  • Grind shells into fine grit
  • Flush with hot water to scrub pipes

7. Compost Booster

Why it helps:

  • Balances acidic compost
  • Speeds up decomposition

How to Prepare Eggshells Properly

  1. Rinse well (remove egg residue)
  2. Dry completely (sun or oven)
  3. Crush/grind based on use

Plants That Love Eggshells

✅ Tomatoes
✅ Peppers
✅ Roses
✅ Spinach
✅ Broccoli

Plants That Don’t Need Them

❌ Blueberries (prefer acidic soil)
❌ Potatoes (can develop scab)

Tossing banana peels? Stop! They’re packed with potassium, phosphorus, and calcium—essential nutrients your plants crave. This easy DIY banana peel fertilizer costs nothing and works better than many store-bought options.

Why Banana Peels Are Garden Gold

✔ Potassium (K) – Strengthens roots & boosts flowering/fruiting
✔ Phosphorus (P) – Encourages strong root development
✔ Calcium (Ca) – Prevents blossom end rot in tomatoes/peppers
✔ Auxins – Natural growth hormones for faster plant growth

4 Easy Ways to Use Banana Peels as Fertilizer

1. Banana Peel Tea (Liquid Fertilizer)

Best for: Quick nutrient boost
How to make:

  1. Chop 3-4 peels into small pieces
  2. Soak in 1L water for 48 hours
  3. Strain & dilute (1:5 ratio with water)
  4. Water plants weekly

Plants that love it:

  • Tomatoes
  • Roses
  • Peppers

2. Dried & Powdered Peel

Best for: Slow-release fertilization
How to make:

  1. Dry peels in sun or oven (low heat)
  2. Grind into powder
  3. Mix 1 tbsp into potting soil

Great for:

  • Seed starting mix
  • Potted plants

3. Direct Burying Method

Best for: Heavy feeders
How to use:

  1. Bury chopped peels 2-4″ deep near plants
  2. Let decompose naturally

Ideal for:

  • Fruit trees
  • Squash plants

4. Compost Accelerator

Best for: Enriching compost piles
How to use:

  • Add whole peels to compost bin
  • Speeds up decomposition

Pro Tips for Best Results

☑ Use organic bananas (avoid pesticide residues)
☑ Chop finely for faster breakdown
☑ Combine with eggshells for extra calcium

Plants That Thrive with Banana Peels

✅ Tomatoes
✅ Roses
✅ Peppers
✅ Citrus trees
✅ Flowering plants

Plants to Avoid

❌ Cacti/succulents (too much moisture)
❌ Carnivorous plants (sensitive to minerals)

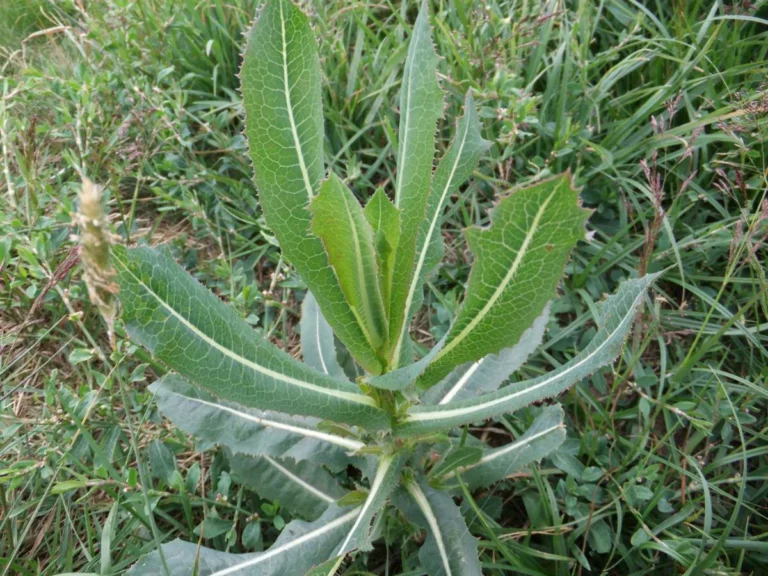
Often dismissed as a common weed, Lactuca serriola (prickly lettuce) has been used for centuries as a natural painkiller and sedative. Modern research is now validating its traditional uses—from easing chronic pain to promoting restful sleep.

7 Proven Benefits of Prickly Lettuce

1. Natural Opioid Alternative

✔ Contains lactucin and lactucopicrin—compounds that act on the central nervous system to relieve pain
✔ Used historically as a mild opium substitute (without addiction risk)

2. Anxiety & Insomnia Relief

✔ Mild sedative effects help calm racing thoughts
✔ Traditional sleep aid (non-habit forming)

3. Respiratory Support

✔ Soothes bronchial irritation and coughs
✔ 19th-century remedy for whooping cough

4. Anti-Inflammatory Powerhouse

✔ Reduces swelling in arthritis and joint pain
✔ Topical poultice for skin inflammation

5. Digestive Aid

✔ Relieves IBS symptoms and stomach cramps
✔ Mild laxative effect for constipation

6. Potential Cancer Fighter

✔ Early studies show apoptosis-inducing effects on leukemia cells

7. Headache & Migraine Relief

✔ Vasoconstrictor properties help reduce vascular headaches

How to Use Prickly Lettuce

1. Pain-Relieving Tea

  • Steep 1 tsp dried leaves in hot water for 10 minutes
  • Drink 1-2x daily for chronic pain

2. Smoking Blend

  • Traditional method for quick relaxation
  • Often mixed with mullein or damiana

3. Tincture (Most Potent Form)

  • Alcohol extract preserves active compounds
  • 5-10 drops as needed

4. Topical Oil

  • Infuse leaves in olive oil for muscle rub

Safety & Cautions

⚠ Pregnant women – May stimulate uterine contractions
⚠ Sedative medications – Can potentiate effects
⚠ Start with low doses – Can cause dizziness in excess

Historical Significance

  • Ancient Egypt: Used in pain-relief rituals
  • American Civil War: Field remedy for wounded soldiers
  • Modern Herbalism: Recognized as a non-addictive analgesic

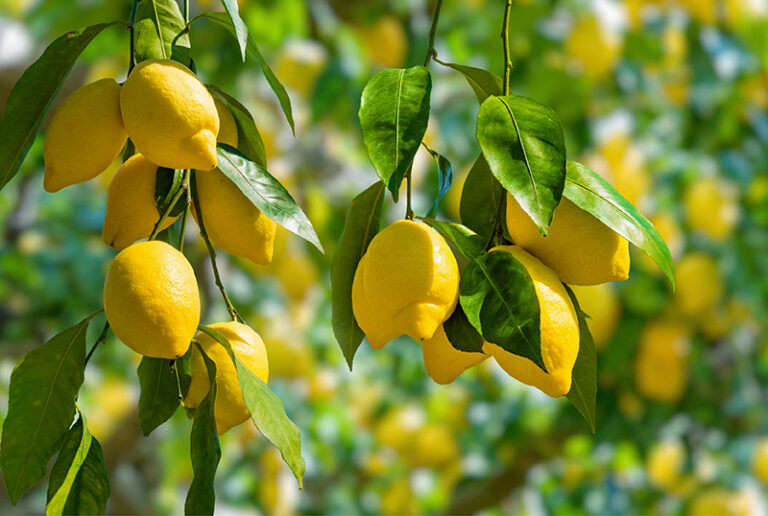
While lemons get all the attention, their fragrant leaves are a hidden treasure in traditional medicine. Packed with antioxidants, antimicrobial compounds, and calming properties, lemon leaves offer benefits far beyond their citrusy aroma.

10 Science-Backed Benefits of Lemon Leaves

1. Natural Stress & Anxiety Reliever

✔ Linalool (a calming terpene) reduces cortisol levels
✔ Chewing 1-2 leaves or brewing tea induces relaxation

2. Fever Reducer

✔ Traditional remedy for malaria and dengue fevers
✔ Perspiration-inducing properties help break fevers

3. Digestive Aid

✔ Stimulates bile production for better fat digestion
✔ Relieves bloating, nausea, and heartburn

4. Powerful Antimicrobial

✔ Effective against:

  • E. coli (foodborne bacteria)
  • Candida albicans (yeast infections)

5. Respiratory Health Booster

✔ Steam inhalation clears sinus congestion
✔ Expectorant properties loosen phlegm

6. Blood Sugar Regulator

✔ Polyphenols improve insulin sensitivity
✔ Used in Ayurveda for diabetes management

7. Skin Healing Wonder

✔ Crushed leaf poultice treats:

  • Acne
  • Fungal infections
  • Minor burns

8. Natural Insect Repellent

✔ Rubbing leaves on skin deters mosquitoes
✔ Boiled leaf spray keeps aphids off plants

9. Oral Health Protector

✔ Chewing leaves freshens breath
✔ Anti-cavity effects (inhibits Streptococcus mutans)

10. Sleep Enhancer

✔ Sedative compounds improve sleep quality
✔ Place leaves under pillow for aromatherapy benefits

How to Use Lemon Leaves

1. Healing Tea

  • Steep 5 fresh leaves in hot water for 10 mins
  • Add honey for cough relief

2. Essential Oil

  • Steam-distilled oil for aromatherapy

3. Topical Compress

  • Crush leaves with coconut oil for skin issues

4. Culinary Uses

  • Wrap fish/meat for citrusy flavor
  • Infuse syrups for desserts

Cautions

⚠ Pregnant women – May stimulate uterine contractions
⚠ Blood pressure meds – Can potentiate effects

Want cleaner, fresher air at home? NASA’s Clean Air Study identified the top plants that remove toxins, boost oxygen, and improve indoor air quality. Here are the 9 best air-purifying plants you need in your space.

1. Snake Plant (Sansevieria)

✔ Removes: Formaldehyde, benzene, xylene
✔ Bonus: Releases oxygen at night (great for bedrooms)
✔ Care: Thrives in low light, needs little water

2. Spider Plant (Chlorophytum comosum)

✔ Removes: Carbon monoxide, formaldehyde
✔ Bonus: Safe for pets, grows quickly
✔ Care: Prefers bright, indirect light

3. Peace Lily (Spathiphyllum)

✔ Removes: Ammonia, benzene, trichloroethylene
✔ BonusFlowers indoors, reduces mold spores
✔ Care: Keep soil moist, moderate light

4. Boston Fern (Nephrolepis exaltata)

✔ Removes: Formaldehyde, xylene
✔ Bonus: Acts as a natural humidifier
✔ Care: Needs high humidity, frequent misting

5. Aloe Vera

✔ Removes: Formaldehyde
✔ BonusHealing gel for burns and skin
✔ Care: Bright light, minimal watering

6. Bamboo Palm (Chamaedorea seifrizii)

✔ Removes: Benzene, trichloroethylene
✔ Bonus: Adds tropical vibes, pet-friendly
✔ Care: Indirect sunlight, keep soil damp

7. English Ivy (Hedera helix)

✔ Removes: Mold, airborne fecal particles
✔ BonusReduces allergens
✔ Care: Prefers cooler temps, moderate light

8. Rubber Plant (Ficus elastica)

✔ Removes: Formaldehyde
✔ BonusLarge leaves for maximum air cleaning
✔ Care: Bright, indirect light

9. Golden Pothos (Epipremnum aureum)

✔ Removes: Carbon monoxide, benzene
✔ BonusHard to kill, grows in low light
✔ Care: Let soil dry between waterings

NASA’s Recommendation

For best results, place 1 plant per 100 sq ft to effectively purify air.

For thousands of years, yarrow (Achillea millefolium) has been a trusted herbal ally—from Greek warriors using it to staunch battle wounds to Native American healers brewing it for fevers. Today, science confirms what traditional medicine knew: this feathery-leaved plant is a pharmacy in the wild, offering benefits from wound healing to digestive relief.

Why Yarrow Stands the Test of Time

1. Nature’s Bandage

  • Stops bleeding fast: Contains achilleine, a clotting compound
  • Antiseptic properties: Prevents infection in cuts and scrapes
  • Used in World War I medkits when supplies ran low

2. Fever & Flu Fighter

  • Induces sweating to break fevers (diaphoretic effect)
  • Relieves cold symptoms:
    ✔ Sore throat (gargle tea)
    ✔ Congestion (steam inhalation)

3. Digestive Soother

  • Bitter compounds stimulate bile flow, aiding digestion
  • Eases heartburn, bloating, and cramps

4. Women’s Health Secret

  • Regulates heavy menstrual bleeding
  • Reduces PMS cramps (traditional European remedy)

5. Skin & Hair Revitalizer

  • Treats eczema, acne, and slow-healing wounds
  • Conditions scalp (infuse in apple cider vinegar rinse)

How to Use Yarrow Safely

For External Use

  • Fresh poultice: Crush leaves, apply to wounds
  • Infused oil: Steep dried yarrow in olive oil for bruises

For Internal Use

  • Tea: 1 tsp dried herb per cup (steep 10 mins)
    → Limit to 2 cups/day (strong herb!)
  • Tincture: 20-40 drops in water (for digestion)

⚠ Caution:

  • Avoid during pregnancy (may stimulate uterus)
  • Rare allergic reactions (test small amount first)

Foraging & Growing Tips

✔ Identify: Look for fern-like leaves and white/pink flower clusters
✔ Harvest: Flowers in summer (most potent medicine)
✔ Grow: Thrives in poor soil with full sun

Modern Research Backs Tradition

  • 2022 study found yarrow speeds wound closure 30% faster than controls
  • Essential oil shows anti-inflammatory effects rivaling OTC drugs

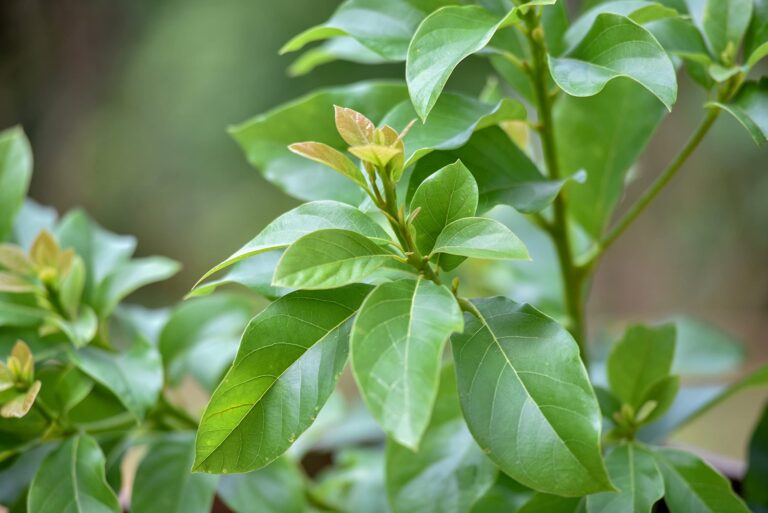
While avocados get all the glory, their leaves are a hidden treasure of medicinal properties. Used for centuries in traditional medicine across Mexico, Africa, and Asia, avocado leaves are now gaining scientific recognition for their remarkable health benefits. From regulating blood sugar to fighting infections, here’s why you should think twice before tossing them away.


Top Medicinal Uses of Avocado Leaves

1. Natural Diabetes Management

Avocado leaves contain polyphenols and flavonoids that help lower blood sugar levels. Studies suggest they may improve insulin sensitivity, making them beneficial for type 2 diabetics.

2. Powerful Anti-Inflammatory Effects

Rich in quercetin and pinene, the leaves can reduce inflammation linked to arthritis, asthma, and digestive disorders.

3. Digestive Health Booster

  • Relieves indigestion, bloating, and constipation
  • Traditional Mexican remedy for stomach ulcers

4. Blood Pressure Regulator

The leaves contain potassium and magnesium, which help relax blood vessels and support heart health.

5. Kidney Stone Prevention

Acts as a natural diuretic, flushing out toxins and reducing the risk of kidney stones.

6. Immune System Support

Packed with antioxidants, they help fight free radicals and strengthen immunity.

7. Pain Relief (Headaches & Menstrual Cramps)

A warm tea made from avocado leaves can act as a natural analgesic.

8. Anti-Aging & Skin Health

  • Promotes collagen production
  • Treats acne, eczema, and fungal infections when applied topically

9. Respiratory Health

Used in folk medicine to treat:
✔ Coughs
✔ Bronchitis
✔ Asthma symptoms

10. Natural Stress & Anxiety Reducer

Contains compounds that promote relaxation and improve sleep quality.


How to Use Avocado Leaves

1. Avocado Leaf Tea

  • Boil 5-6 dried leaves in water for 10 minutes.
  • Strain and drink (add honey for taste).
    ✅ Best for digestion, diabetes, and relaxation.

2. Topical Paste for Skin/Wounds

  • Crush fresh leaves into a paste.
  • Apply to wounds, rashes, or acne.

3. Aromatherapy & Steam Inhalation

  • Boil leaves and inhale steam for congestion relief.

Scientific Backing

  • 2021 study in the Journal of Ethnopharmacology confirmed avocado leaves’ anti-diabetic effects.
  • Research in Phytotherapy Research highlighted their antibacterial properties against E. coli and Staphylococcus.

Precautions

⚠ Do not consume in excess—high doses may cause nausea.
⚠ Pregnant women should consult a doctor before use.