Author

Pure Garden

Browsing

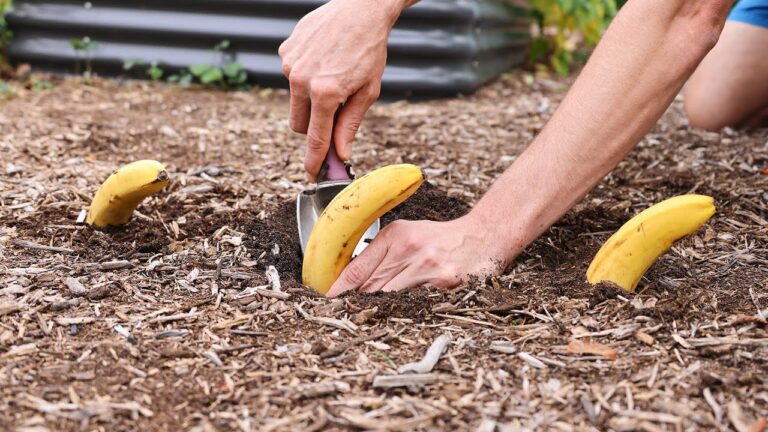
Transform your garden’s vitality with a simple, eco-friendly trick: hanging an overripe banana among your plants. This method offers multiple benefits, from attracting essential pollinators to enriching the soil.

Why Hang an Overripe Banana?

  1. Attracts Beneficial Pollinators: The sweet scent of an overripe banana lures butterflies, bees, and other pollinators, enhancing the pollination of your flowers and vegetables.

  2. Enriches Soil Nutrients: As the banana decomposes, it releases vital nutrients like potassium and phosphorus into the soil, promoting robust plant growth.

  3. Natural Pest Management: By attracting beneficial insects such as ladybugs, which prey on common pests like aphids, the banana aids in naturally controlling pest populations.

How to Hang an Overripe Banana:

  • Select the Banana: Choose an overripe banana with a strong aroma.

  • Prepare for Hanging: Place the banana in a mesh bag or tie a string around its stem.

  • Choose the Location: Hang it from a tree branch or a garden stake, ensuring it’s accessible to pollinators but away from high-traffic areas

  • Monitor and Replace: Check periodically, and replace the banana once it’s fully decomposed or if unwanted pests are attracted.

This straightforward practice not only recycles kitchen waste but also fosters a thriving garden ecosystem.

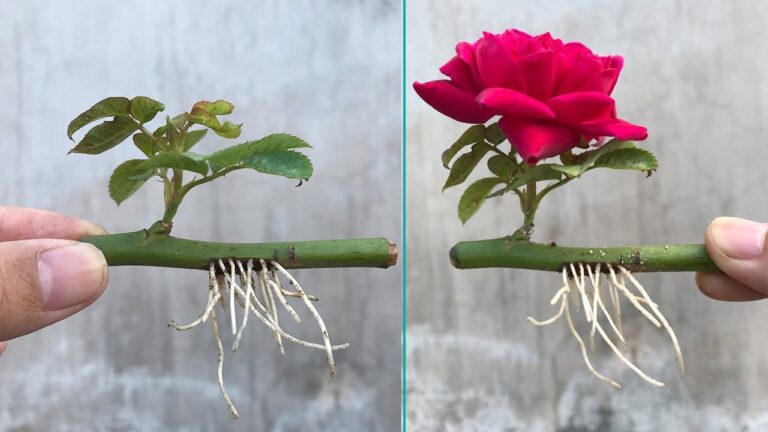
Propagating roses can be a fulfilling way to expand your garden, and the water glass method offers a straightforward approach to achieve this. Here’s a step-by-step guide to help you propagate roses using this technique:​

Materials Needed:

  • Healthy rose cuttings

  • Clean glass or jar

  • Fresh, lukewarm water

  • Optional: Aloe vera gel

Step-by-Step Guide:

  1. Select and Prepare the Cutting:

    • Choose a healthy stem from a rose plant, ideally one that has recently bloomed.

    • Using clean, sharp scissors or pruning shears, cut the stem just below a flower.

    • Measure approximately five nodes down the stem and make a diagonal cut below the fifth node. This angled cut increases the surface area for rooting

    • Remove any flowers, buds, or leaves from the lower half of the cutting.

  2. Optional – Apply Aloe Vera Gel:

    • Extract fresh aloe vera gel from a leaf and blend it until smooth.

    • Submerge the base of the rose cutting into the aloe vera gel. Aloe vera acts as a natural rooting hormone, potentially enhancing root development.

  3. Place the Cutting in Water:

    • Fill a clean glass or jar halfway with lukewarm water.

    • Insert the prepared rose cutting into the water, ensuring that no leaves are submerged, as this can lead to rot.

    • If you’ve used aloe vera gel, you can add the remaining gel into the water as well.

  4. Provide Optimal Conditions:

    • Position the glass in a location with bright, indirect sunlight. Avoid direct sunlight, which can overheat the cutting.

    • Maintain a consistent room temperature, ideally between 65-75°F (18-24°C).

  5. Monitor and Maintain:

    • Change the water every 3-5 days to prevent bacterial growth and ensure oxygen availability.

    • Observe the cutting for signs of root development, which typically begins within 3-4 weeks.

    • If the water becomes cloudy or develops an odor, replace it promptly.

  6. Transplanting:

    • Once the roots are 2-4 inches (5-10 cm) long, prepare a pot with well-draining potting soil.

    • Gently transfer the rooted cutting into the soil, ensuring the roots are adequately covered.

    • Water the newly potted rose cutting to settle the soil around the roots.

    • Continue to provide bright, indirect sunlight and maintain consistent moisture without waterlogging the soil.

Tips for Success:

  • Patience is Key: Root development can vary; some cuttings may take longer than others.

  • Use Healthy Cuttings: Ensure the parent plant is disease-free to increase the chances of successful propagation.

  • Avoid Overcrowding: If propagating multiple cuttings, use separate containers to prevent entanglement of roots.

By following these steps, you can successfully propagate roses using the water glass method, adding beautiful blooms to your garden.

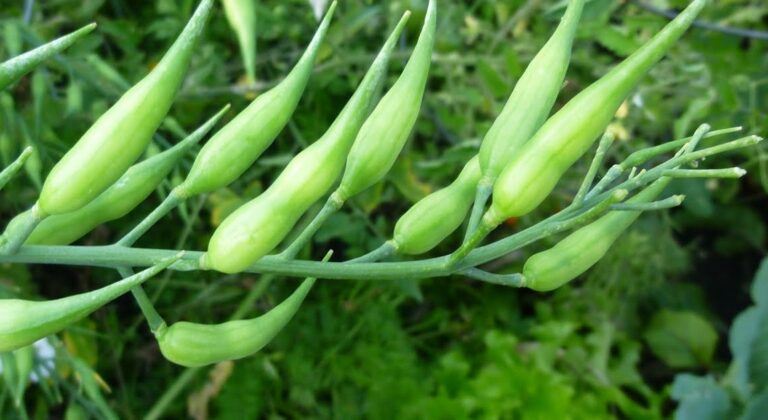
Radishes are renowned for their crisp, peppery roots, but their edible seed pods are an often-overlooked treasure that can significantly enhance your culinary experiences. By allowing radish plants to flower and produce pods, you can enjoy a second, flavorful harvest from a single planting.

Growing Radish Pods

  1. Choosing the Right Variety

    While all radish varieties produce edible pods, certain types are cultivated specifically for their pod production. Varieties like ‘Rat’s Tail’ radish are known for yielding abundant and tender pods.

  2. Planting and Cultivation

    • Timing: Sow radish seeds in early spring or fall for optimal growth.

    • Soil: Use well-drained, fertile soil with a pH between 6.5 and 7.0.

    • Sunlight: Ensure the plants receive full sun to partial shade.

    • Watering: Maintain consistent moisture to promote healthy growth.

  3. Allowing to Flower and Pod Formation

    Unlike traditional radish cultivation focused on root development, allow the plants to mature and bolt (flower). After flowering, slender, green seed pods will emerge along the stems. These pods are typically ready for harvest two to three weeks after flowering.

Harvesting and Culinary Uses

  • Harvesting: Pick the pods when they are young and tender, usually 1 to 2 inches in length, to enjoy their optimal flavor and texture.

  • Flavor Profile: Radish pods offer a crunchy texture with a mildly spicy, peppery flavor, similar to the radish root but often milder.

  • Culinary Applications:

    • Fresh Consumption: Add raw radish pods to salads for a crunchy, spicy element.

    • Stir-Fries: Incorporate them into stir-fried dishes alongside other vegetables.

    • Pickling: Pickle the pods using a mixture of vinegar, water, sugar, and salt for a tangy snack.

Nutritional Benefits

Radish pods are low in calories and rich in essential nutrients:

  • Vitamins: Notably, they contain vitamins B6 and B2, which support brain development, mood regulation, and skin health.

  • Minerals: They provide minerals such as potassium, contributing to heart health.

  • Antioxidants: The pods are a source of antioxidants, aiding in overall health maintenance.

By embracing the cultivation and consumption of radish pods, you not only maximize your garden’s yield but also introduce a versatile and nutritious ingredient into your meals.

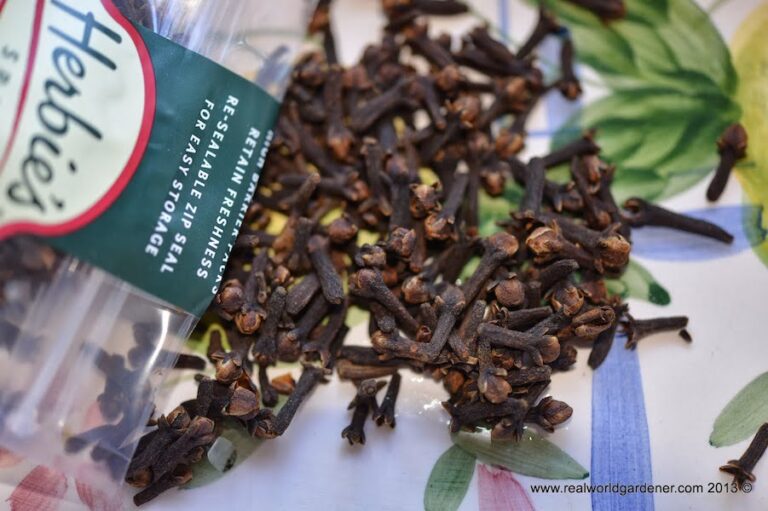
Cultivating your own clove tree (Syzygium aromaticum) can be a fulfilling endeavor, offering both aromatic spices and an attractive addition to your garden. This guide provides detailed steps to successfully grow clove plants from seeds, ensuring a healthy and productive tree

Understanding Clove Trees

Clove trees are tropical evergreens native to Indonesia, renowned for their aromatic dried flower buds used as a spice. They thrive in warm, humid environments and can reach heights of up to 25 feet. Growing clove trees requires patience, as they may take several years to produce flowers.

Step 1: Sourcing and Preparing Clove Seeds

  • Selecting Fresh Seeds: Obtain fresh clove seeds, as their viability diminishes quickly once dried. Fresh seeds are typically extracted from ripe clove fruits.

  • Soaking Seeds: Soak the seeds in warm water for 24 hours to soften the seed coat and enhance germination rates.

Step 2: Germinating the Seeds

  • Planting Medium: Use a well-draining potting mix rich in organic matter.

  • Sowing Seeds: Plant the soaked seeds about 1 inch deep in small pots or seed trays.

  • Creating Humidity: Cover the pots with plastic wrap or place them in a greenhouse to maintain high humidity levels.

  • Temperature Requirements: Keep the environment consistently warm, ideally between 70°F to 85°F (21°C to 30°C).

  • Germination Period: Be patient, as germination can take several weeks to a few months.

Step 3: Transplanting Seedlings

  • Developing Seedlings: Once seedlings have developed several sets of true leaves, they are ready for transplanting.

  • Choosing Containers: Select larger pots with good drainage to accommodate root growth.

  • Soil Composition: Use a rich, loamy soil with added organic matter to support healthy development.

Step 4: Caring for Clove Plants

  • Light Requirements: Provide partial shade to protect young plants; mature trees can gradually adapt to full sun.

  • Watering: Maintain consistent soil moisture without waterlogging.

  • Humidity: Clove trees prefer high humidity; regular misting or using a humidifier can help.

  • Fertilization: Apply a balanced fertilizer during the growing season to promote vigorous growth.

  • Pruning: Prune to remove dead or diseased branches and to shape the tree as desired

Step 5: Anticipating Flowering and Harvesting

  • Time to Maturity: Clove trees may take 5 to 10 years to start flowering.

  • Harvesting Cloves: Harvest unopened flower buds when they turn pink; dry them in a shaded, well-ventilated area until they darken to the familiar brown color.

Growing a clove tree from seed is a long-term commitment that rewards patience with a unique and aromatic spice straight from your garden.

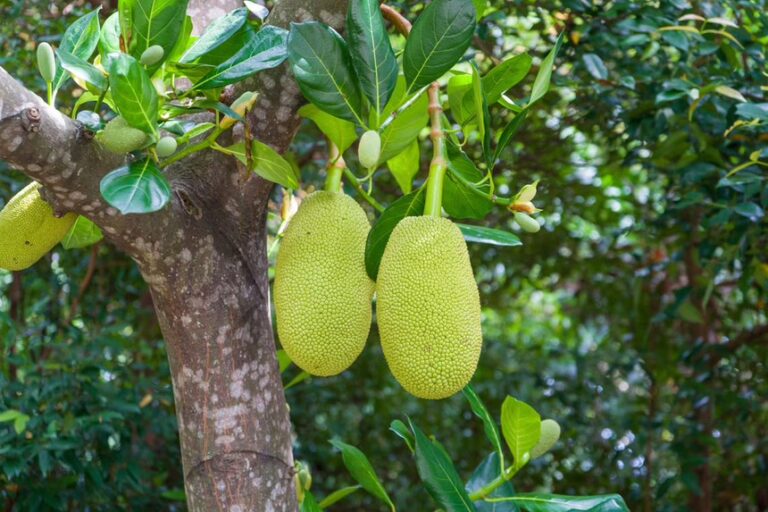
Embarking on the journey of growing a jackfruit tree from seed has been both rewarding and educational. Here’s a step-by-step guide based on my personal experience:​

1. Selecting and Preparing the Seeds

  • Choosing Fresh Seeds: I began with fresh seeds extracted from a ripe jackfruit, ensuring they were planted within a week to maintain viability.

  • Cleaning and Soaking: After removing any residual fruit flesh to prevent fungal issues, I soaked the seeds in lukewarm water for 24 hours to enhance germination rates.

2. Germinating the Seeds

  • Planting Medium: I prepared a well-draining mix of peat, perlite, and vermiculite in small pots.

  • Planting Depth: Each seed was planted about an inch deep, then watered gently.

  • Creating Humidity: To maintain humidity, I covered the pots with plastic wrap, ensuring regular ventilation to prevent mold growth.

3. Caring for the Seedlings

  • Watering: I kept the soil consistently moist but avoided waterlogging.

  • Lighting: Once sprouts appeared, I moved the seedlings to a location receiving 6-8 hours of direct sunlight daily.

4. Transplanting

  • Timing: When the seedlings developed 2-3 true leaves, I prepared them for transplanting.

  • Container Selection: For container growth, I chose large pots with adequate drainage to accommodate the tree’s extensive root system.

5. Ongoing Care

  • Mulching: Applying mulch around the base helped retain soil moisture and regulate temperature.

  • Fertilization: I used a balanced, slow-release fertilizer during the growing season to support healthy development.

  • Pruning: Regular pruning maintained the tree’s shape and removed any dead or diseased branches.

Bay leaves have long been esteemed in culinary traditions for their distinctive aroma and flavor. Beyond their kitchen applications, some cultures have embraced the practice of burning bay leaves, attributing various benefits to this ritual. While anecdotal accounts suggest several advantages, it’s essential to approach these claims with a balanced perspective, considering both traditional beliefs and scientific insights.

1. Aromatherapy and Relaxation

Burning bay leaves releases a fragrant smoke that many find calming. This practice is believed to reduce stress and promote relaxation. However, scientific evidence supporting these effects is limited. A 2021 study on rats indicated potential cognitive benefits from inhaling compounds found in bay leaves, but further research is needed to confirm these effects in humans.

2. Respiratory Considerations

Some suggest that inhaling the smoke from burning bay leaves can alleviate respiratory issues. However, health professionals generally advise against inhaling smoke from any source due to potential risks, including lung irritation and oxidative stress. Alternative methods, such as using bay leaf essential oils in a diffuser, may offer a safer way to experience the plant’s aroma.

3. Natural Insect Repellent

The scent produced by burning bay leaves is traditionally believed to deter insects like mosquitoes and flies. While bay leaves contain compounds with insect-repelling properties, the effectiveness of this method in practical settings remains uncertain. Using bay leaves as a pantry deterrent for pests is a more commonly accepted practice.

4. Mental Clarity and Focus

Some individuals report enhanced mental clarity and concentration when burning bay leaves. These claims are largely anecdotal, and scientific research has yet to substantiate such cognitive benefits in humans.

5. Spiritual and Ritualistic Practices

Burning bay leaves holds cultural and spiritual significance in various traditions, symbolizing purification and the dispelling of negative energy. While these practices are meaningful within specific cultural contexts, they are subjective and not grounded in scientific evidence.

6. Air Freshening Properties

The aromatic smoke from burning bay leaves can mask unpleasant odors, serving as a natural air freshener. However, it’s important to consider ventilation and potential respiratory sensitivities when using smoke for this purpose.

Safety Considerations

If you choose to burn bay leaves, prioritize safety:

  • Ventilation: Ensure the area is well-ventilated to minimize smoke inhalation.

  • Supervision: Never leave burning leaves unattended.

  • Health Conditions: Individuals with respiratory issues should consult a healthcare professional before exposure to any form of smoke.

While burning bay leaves is a practice rooted in tradition with various attributed benefits, it’s crucial to approach it with caution and be aware of the limited scientific evidence supporting these claims. Exploring alternative methods, such as using bay leaf essential oils, may provide a safer way to experience the potential advantages associated with this plant.
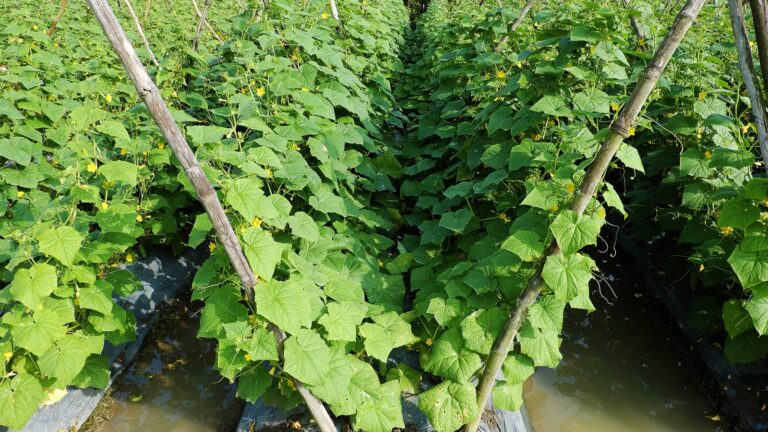
In my quest to optimize my garden space and improve my cucumber harvest, I experimented with planting cucumbers in a herringbone pattern. This method, known for its space efficiency and enhanced plant health benefits, intrigued me. Here’s a step-by-step guide based on my experience:​

1. Planning the Garden Layout

  • Choosing the Location: I selected a sunny spot in my garden, as cucumbers thrive with ample sunlight.

  • Soil Preparation: I ensured the soil was rich, well-draining, and had a neutral pH. Adding compost provided the necessary nutrients for healthy growth.

2. Setting Up the Herringbone Structure

  • Materials Needed: Sturdy stakes (such as bamboo) and garden twine or netting.

  • Constructing the Pattern:

    • I placed two parallel rows of stakes about 18 inches apart.

    • Angling the stakes to intersect at the top formed a series of ‘X’ shapes along the rows.

    • Securing the intersections with twine provided stability.

    • Connecting the stakes with additional twine or netting offered support for the climbing vines.

3. Planting and Training the Cucumbers

  • Sowing Seeds: I planted cucumber seeds at the base of each stake, ensuring consistent moisture during germination.

  • Guiding the Vines: As the plants grew, I gently trained the vines to climb the stakes, using soft ties to secure them. Regular pruning of lateral branches improved air circulation and directed energy towards fruit production.

4. Ongoing Care

  • Watering: Maintaining consistent soil moisture was crucial, especially during flowering and fruiting stages.

  • Fertilizing: Applying a balanced fertilizer every few weeks supported vigorous growth.

  • Pest and Disease Management: Regular monitoring allowed for early detection of issues, and I used organic treatments like neem oil when necessary.

5. Harvesting

  • Timing: I harvested cucumbers when they reached medium size and had a firm texture, which encouraged continuous production.

  • Method: Using a sharp knife to cut the cucumbers from the vine prevented damage to the plant.

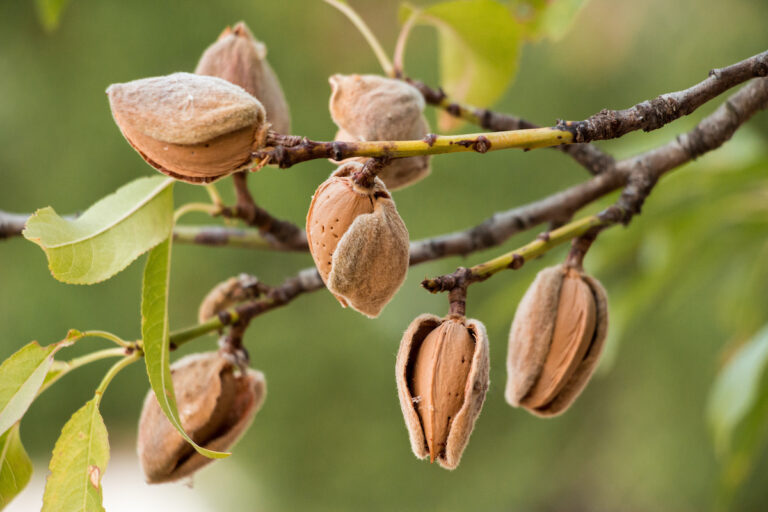
Embarking on the journey of growing an almond tree from seed has been both rewarding and educational. Here’s a step-by-step guide based on my experience:​

1. Selecting and Preparing Almond Seeds

  • Choosing Seeds: I opted for raw, unprocessed almonds, ensuring they were free from roasting or chemical treatments.

  • Stratification Process: To simulate winter conditions and encourage germination, I soaked the almonds in water for 48 hours. Afterward, I wrapped them in a moist paper towel, placed them inside a plastic bag, and refrigerated them for several weeks.

2. Planting the Seeds

  • Timing: Spring proved to be the ideal season for planting.

  • Soil Preparation: I prepared well-draining soil with a pH between 6 and 7.5, enriching it with compost for added nutrients.

  • Planting Depth: Each seed was planted 2-3 inches deep, followed by thorough watering.

  • Sunlight Exposure: Choosing a sunny location was crucial, as almond trees thrive with ample sunlight.

3. Nurturing the Seedling

  • Watering: Consistent watering during the tree’s early stages promoted healthy growth.

  • Pruning: I focused on developing a strong framework by pruning in the initial years and later encouraged sunlight penetration and air circulation to minimize disease risk.

  • Fertilization: Applying a balanced fertilizer during the growing season supported robust development.

4. Protecting the Young Tree

  • Pest and Disease Management: Regular monitoring helped in early detection and management of common pests like aphids and potential fungal infections.

  • Winter Care: In harsher climates, I used mulch and protective wraps to shield the young tree from extreme cold.

5. Anticipating the Harvest

  • Patience Required: Understanding that almond trees typically begin producing nuts in their 3rd or 4th year, with full production after 5-6 years, helped set realistic expectations.

  • Harvest Indicators: I looked for splitting hulls revealing the shells as a sign of readiness, usually in late summer to early fall.

  • Post-Harvest Care: After harvesting, I allowed the almonds to dry in a cool, dry place for about a week before storage.

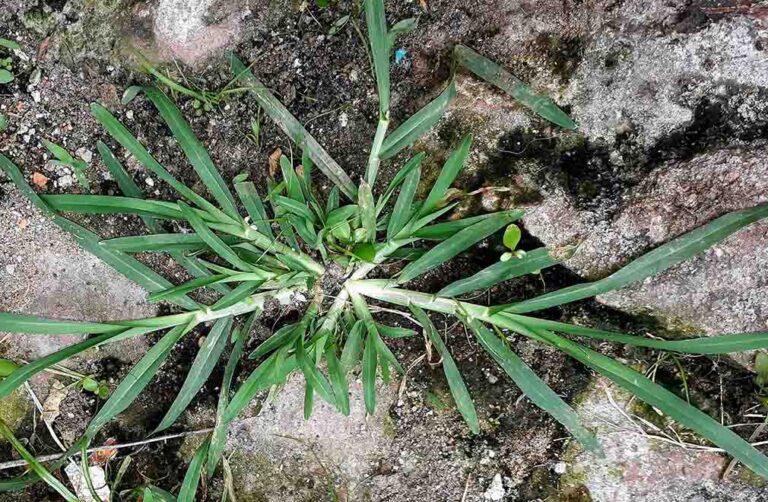
Like many, I used to overlook the common weeds in my backyard, dismissing them as mere nuisances. That changed when I discovered that one of these plants, often discarded without a second thought, possesses remarkable medicinal properties. Known as goosegrass, this unassuming herb has been traditionally used to address a variety of health concerns. Here’s how I incorporated it into my wellness routine:​

How I Used Goosegrass for Health Benefits

Ingredients:

  • Fresh goosegrass leaves

  • Water

  • Optional: honey or lemon for flavor

Method:

  1. Identify and Harvest: I ensured the plant was indeed goosegrass and harvested fresh, uncontaminated leaves from my backyard.

  2. Prepare the Tea: I washed a handful of leaves thoroughly, boiled them in about 2 cups of water for 5 minutes, then strained the infusion.

  3. Consumption: I drank this tea once daily, adding honey for taste.

Benefits I Experienced:

  • Digestive Support: I noticed improved digestion and reduced bloating after meals.

  • Enhanced Energy: Regular consumption seemed to boost my overall energy levels.

  • Skin Health: Applying a poultice of crushed leaves helped soothe minor skin irritations.

I recently began incorporating ginger tea into my daily routine and was amazed by the positive changes I experienced. Not only did it add a comforting ritual to my day, but it also offered several health benefits that I hadn’t anticipated. Here’s how I prepared the tea and the benefits I noticed:​

How I Made My Ginger Tea

Ingredients:

  • 1 to 2 inches of fresh ginger root

  • 2 cups of water

  • Optional: honey or lemon to taste

Instructions:

  1. Prepare the Ginger: I washed the ginger root thoroughly and sliced it thinly, without peeling.

  2. Boil the Water: I brought 2 cups of water to a boil in a small saucepan.

  3. Add Ginger: Once the water was boiling, I added the ginger slices and reduced the heat to let it simmer for about 10 minutes.

  4. Strain and Serve: After simmering, I strained the tea into a mug and added a bit of honey for sweetness and a squeeze of lemon for extra flavor.

Benefits I Experienced

  1. Improved Digestion: Drinking ginger tea after meals helped me feel less bloated and more comfortable.

  2. Reduced Nausea: On days when I felt slightly nauseous, a warm cup of ginger tea provided quick relief.

  3. Enhanced Immunity: I noticed that during the cold season, I felt more resilient and experienced fewer minor illnesses.

  4. Pain Relief: After workouts, ginger tea seemed to alleviate some of my muscle soreness.

  5. Better Circulation: I felt warmer and more invigorated, especially on colder days, which I attribute to improved blood flow.