Category

DIY

Category

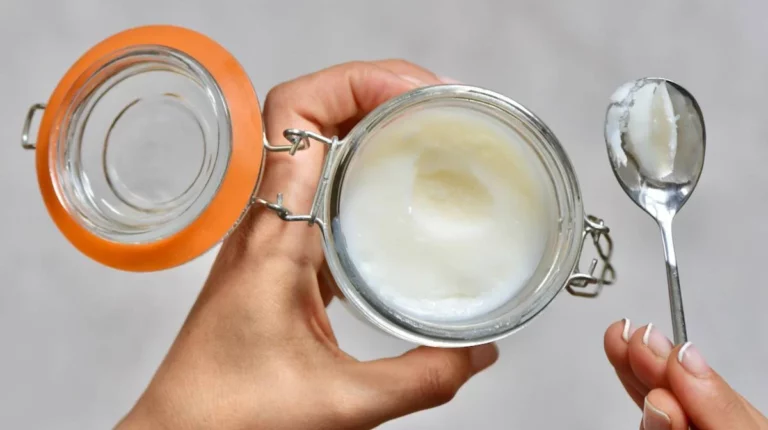
Coconut oil is a versatile staple used in cooking, skincare, and haircare. While store-bought options are convenient, homemade coconut oil is fresher, purer, and free from additives. Best of all, it’s surprisingly easy to make with just one ingredient: fresh coconuts.

Here’s the simplest method to extract pure coconut oil in your own kitchen.

Why Make Coconut Oil at Home?

✔ No preservatives or chemicals – Pure, natural oil
✔ Cost-effective – Cheaper than premium organic brands
✔ Customizable – Control thickness and aroma
✔ Freshness guaranteed – No long shelf-life processing

What You’ll Need

  • 2-3 mature brown coconuts (or 4-5 cups grated coconut)
  • Warm water (for extraction)
  • Blender or grater
  • Cheesecloth or strainer
  • A large bowl and jar (for storage)

(Optional: A slow cooker or saucepan for faster separation.)

Step-by-Step Process

1. Extract the Coconut Meat

  • Crack open the coconuts, drain the water (save it for drinking!), and scoop out the white flesh.
  • Rinse the meat to remove any shell fragments.

2. Grate or Blend the Coconut

  • Traditional method: Grate the coconut finely.
  • Faster method: Blend chunks with a little warm water to make a paste.

3. Make Coconut Milk

  • Mix the grated coconut with 2 cups of warm (not boiling) water.
  • Knead and squeeze with your hands for 5-10 minutes to extract thick, creamy milk.
  • Strain through cheesecloth into a bowl.

4. Separate the Oil from the Milk

  • Cold method (natural separation):
    • Let the milk sit for 24 hours—the cream will rise to the top.
    • Skim off the thick layer and heat it on low until the oil separates.
  • Quick method (heating):
    • Simmer the coconut milk on low heat, stirring occasionally.
    • After 1-2 hours, the water will evaporate, leaving pure oil.

5. Filter and Store

  • Strain the oil through a fine cloth to remove solids.
  • Pour into a clean glass jar and store in a cool, dark place.

Tips for Best Results

 Use mature coconuts – They yield more oil than young ones.
 Low heat is key – High heat can degrade oil quality.
 Unrefined vs. refined – Skip bleaching or deodorizing for a natural, aromatic oil.
 Shelf life – Homemade coconut oil lasts 6-12 months if stored properly.

Uses for Your Homemade Coconut Oil

  • Cooking – Ideal for frying, baking, or adding to smoothies.
  • Skincare – A natural moisturizer for face and body.
  • Haircare – Deep conditioner or frizz tamer.
  • Oil pulling – Promotes oral health.

Final Thoughts

Making coconut oil at home is a rewarding process that ensures purity and freshness. While it takes some time, the result is a chemical-free, multipurpose oil that beats store-bought versions in quality.

Ready to try it? Grab some coconuts and get started!
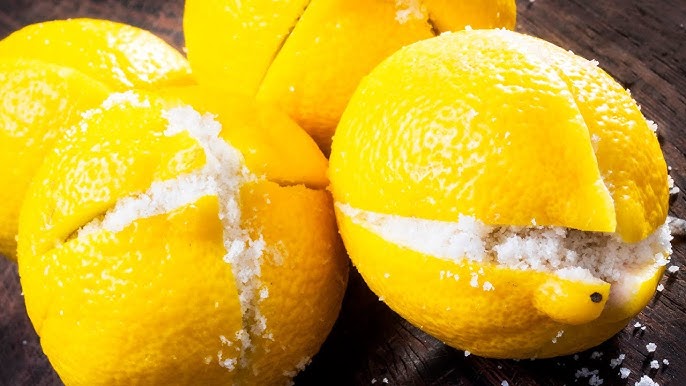
Enhancing your living environment can be both simple and natural. One such method involves using salted limes, a practice rooted in traditional wisdom, believed to offer various benefits for your room’s ambiance.

Benefits of Placing Salted Limes in Your Room

  1. Air Freshening: The natural citrus aroma of limes can help mask unpleasant odors, contributing to a fresher atmosphere.

  2. Aromatherapy Effects: The scent of citrus fruits like limes is known for its potential to uplift mood, reduce stress, and enhance mental clarity.

  3. Humidity Regulation: Salt possesses hygroscopic properties, meaning it can absorb moisture from the air, potentially aiding in reducing humidity levels in your room.

How to Prepare and Use Salted Limes

  1. Select Fresh Limes: Choose ripe, firm limes for optimal aroma and effectiveness.

  2. Cut and Salt: Slice the limes into quarters. Lightly sprinkle each piece with natural salt, such as sea salt or Himalayan pink salt.

  3. Placement: Arrange the salted lime quarters on small dishes or directly on surfaces in various areas of your room, such as near windows, on bedside tables, or shelves.

  4. Maintenance: Replace the limes weekly to ensure continuous freshness and effectiveness.

Integrating salted limes into your room decor is an easy, natural approach to enhance your living space’s ambiance, potentially offering a fresher scent and a more pleasant environment.

If you’re heading away for a few weeks or just want a hands-off way to keep your garden hydrated, there’s a clever trick that uses something you already have at home. With just a plastic bottle and a little setup, you can keep your plants watered for up to a month without buying any fancy tools.

This method works great for both outdoor and potted plants and can be set up in just a few minutes.

What you’ll need

  • One empty plastic bottle (like a 1.5 or 2-liter soda bottle)

  • A sharp object like a needle, nail, or small screwdriver

  • Water

  • A shovel or trowel (for outdoor use)

How to make your DIY slow-drip irrigation

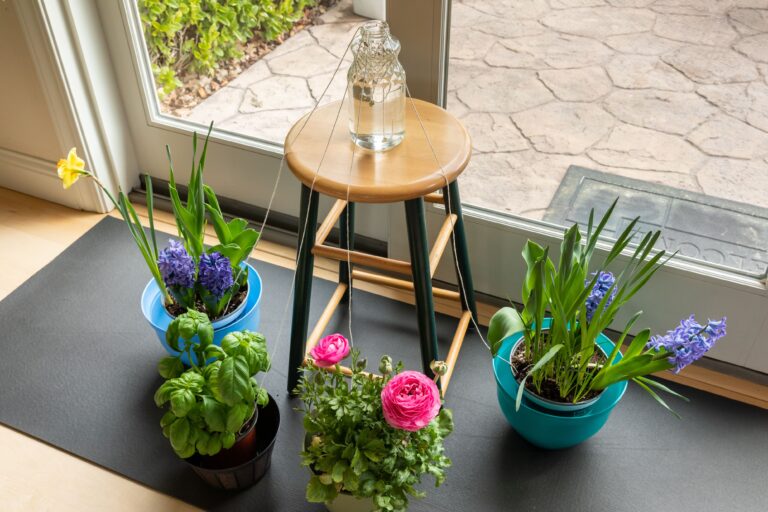
  1. Take your clean plastic bottle and poke a small hole about 5 to 7 centimeters up from the bottom. You only need one small hole—just enough to let the water drip slowly.

  2. Fill the bottle with water and put the cap back on. You can leave it slightly loose if you want to increase airflow and speed up the drip.

  3. Dig a small hole near the base of your plant, deep enough to bury the bottle upright with the hole below soil level.

  4. Place the bottle in the hole and pack the soil around it tightly. Make sure the hole is facing the plant roots.

  5. Refill the bottle every few weeks, depending on the size of the plant and the heat in your area. In many cases, one full bottle will last up to 2–4 weeks.

Bonus tip

For even longer-lasting moisture, you can add a layer of mulch around the plant to help hold the water in the soil.

This method is perfect for travel, forgetful waterers, or gardeners who want a backup plan during hot weather. It’s cheap, simple, and surprisingly effective.

Peppers are one of the easiest and most rewarding veggies to grow at home. Whether you’re into sweet bell peppers or spicy jalapeños, a few simple tricks can seriously boost your harvest. With the right setup, you’ll be picking peppers all season long—and probably giving extras away to your neighbors.

Why Grow Peppers at Home?

  • Super low-maintenance once they get going
  • Can grow in pots, raised beds, or small garden spaces
  • Fresh, homegrown peppers taste way better than store-bought
  • One plant can give you dozens of fruits with the right care

The Secret to Big Yields

  1. Choose the Right Variety
    Start with a pepper type that grows well in your climate. Bell, jalapeño, banana, cayenne—there are tons to choose from, and they each thrive a little differently.

  2. Start from Seed (or Buy Healthy Seedlings)
    If you’re starting from seed, give them plenty of warmth and light. If you’re buying seedlings, pick ones that are short, strong, and vibrant green.

  3. Give Them Lots of Sun
    Peppers love heat and sunlight—aim for at least 6–8 hours a day. The more sun, the more fruit.

  4. Use Rich, Well-Draining Soil
    Mix compost or organic matter into the soil to give your peppers all the nutrients they need. They like soil that holds moisture but drains well.

  5. Water Consistently
    Keep the soil moist but not soggy. Deep watering 2–3 times a week is better than shallow watering every day.

  6. Feed Them Regularly
    Use a balanced organic fertilizer or one high in phosphorus to encourage flowering and fruit production.

  7. Prune Sparingly
    You can pinch off the very first flowers to help the plant grow bigger before it starts producing peppers.

  8. Support Heavy Branches
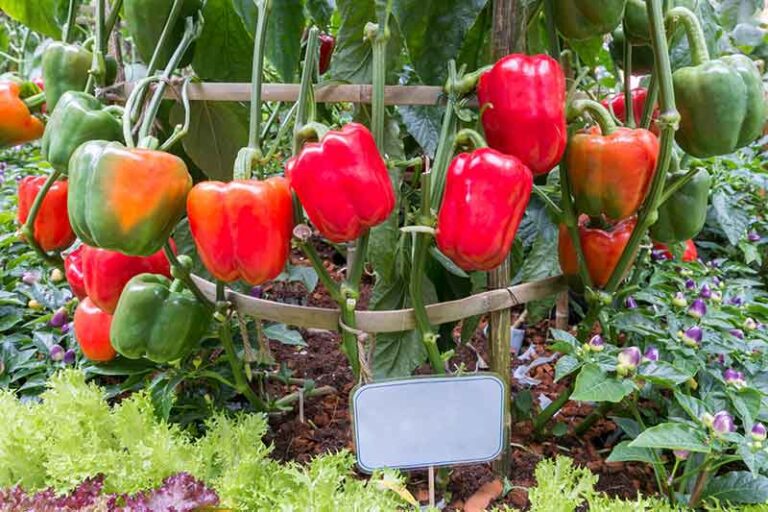
    As fruits develop, some branches can get weighed down. Use stakes or cages to keep them from snapping.

  9. Harvest Often
    The more you pick, the more your plant will produce. Don’t wait too long—peppers can get wrinkly if left too long on the plant.

Bonus Tips

  • Add mulch around the base to keep moisture in and weeds out
  • Keep an eye out for pests like aphids or spider mites—treat early with neem oil or insecticidal soap
  • For spicier peppers, stress the plant a bit by letting the soil dry slightly between waterings (yep, that’s a real trick)

The Bottom Line

Peppers are the kind of crop that rewards just a little effort with a whole lot of produce. Give them sun, warmth, and water—and they’ll take it from there. Once you’ve tasted your own homegrown pepper, you’ll never go back.

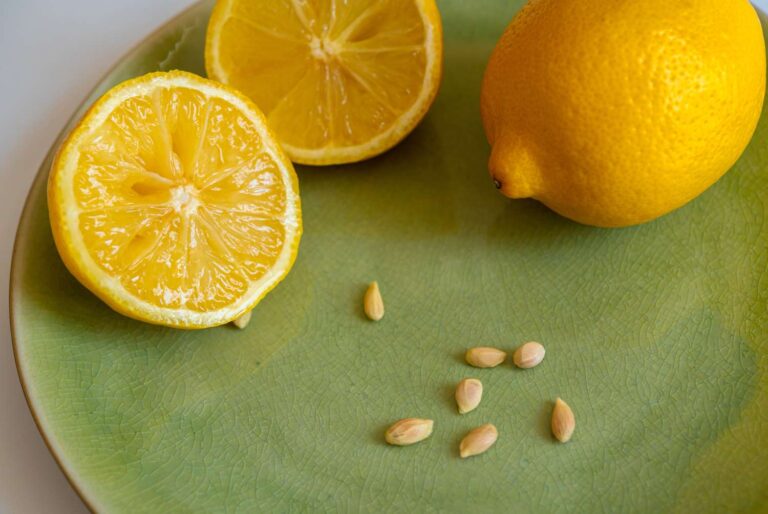
Don’t toss your lemon seeds! These tiny leftovers from your favorite citrus fruit are more useful than you think. Instead of throwing them away, you can put lemon seeds to work around your home, garden, and even in your beauty routine. Here are 10 smart and simple ways to reuse lemon seeds and get the most out of every lemon.

1. Grow Your Own Lemon Tree

Dry out your lemon seeds and plant them in small pots. With time and care, you can grow your very own lemon tree right at home—perfect for patios, balconies, or indoor gardening.

2. Natural Air Freshener

Boil lemon seeds along with citrus peels and herbs like rosemary or mint. It creates a refreshing, all-natural scent that makes your whole house smell amazing.

3. Lemon Seed Oil (DIY)

Crush and steep the seeds in a carrier oil (like olive oil) for a few days. The result is a lightly lemon-scented oil that can be used in skincare or as a massage oil.

4. Plant Fertilizer

Crushed lemon seeds can be added to compost or directly into garden soil. As they break down, they add nutrients and improve the quality of your soil.

5. DIY Lip Balm Add-In

Add a bit of lemon seed oil to homemade lip balm for a subtle citrus scent and added skin nourishment.

6. Natural Exfoliant

Dry the seeds and grind them into a fine powder. Mix with honey or yogurt for a gentle face scrub that helps remove dead skin cells.

7. Keeps Bugs Away

Some say placing lemon seeds near windowsills or in garden beds helps repel certain bugs due to their citrus scent.

8. Kitchen Cleaner Booster

Toss a few lemon seeds into your homemade vinegar-based cleaner. They’ll help boost the lemony scent and can add mild antibacterial properties.

9. Scented Sachets

Dry lemon seeds and combine them with dried herbs or flowers in small fabric bags. Perfect for placing in drawers or closets for a light, refreshing aroma.

10. Skin-Toning Face Mist

Steep lemon seeds in hot water, let it cool, and pour it into a spray bottle. Use it as a light facial mist for a refreshing boost.

Turn Waste into Something Useful

Lemon seeds are often tossed without a second thought, but they’re full of potential. From gardening to DIY beauty to natural cleaning, there are so many clever ways to reuse them. Give a few of these ideas a try—you might be surprised by how handy those little seeds can be!