Category

Gardening

Category

Weeding is a crucial, albeit challenging, aspect of maintaining a vibrant garden. While preventive measures like dense planting and mulching can reduce weed growth, having the right tools is indispensable for effective weed management. Here are nine essential weeding tools that can make the task more efficient and less strenuous:​

1. Fiskars 4-Claw Weeding Tool

This ergonomic tool allows gardeners to remove weeds without bending or kneeling. Its four serrated claws firmly grasp weeds, making it ideal for tackling invasive species like dandelions.

2. CobraHead Original Weeder & Cultivator

Featuring a curved steel blade, the CobraHead is perfect for precision weeding in tight spaces. Its design enables easy removal of stubborn weeds and facilitates soil cultivation.

3. Hori Hori Garden Knife

This versatile Japanese tool serves multiple purposes, including digging, cutting, and weeding. With a sharp, concave blade marked for measurement, it’s excellent for transplanting and removing deep-rooted weeds.

4. Nejiri Gama Hoe

A lightweight hand hoe with a sharp blade, the Nejiri Gama is effective for slicing weeds just below the soil surface. Its compact size makes it suitable for working in confined areas.

5. Dutch Hoe

Designed for use in a push-pull motion, the Dutch hoe cuts weeds at the root level with minimal soil disturbance. Its long handle allows for comfortable, upright operation.

6. Stirrup Hoe (Scuffle Hoe)

Named for its stirrup-shaped blade, this hoe is adept at cutting weeds on both forward and backward strokes. It’s particularly useful for covering large areas quickly.

7. Dandelion Weeder

Specifically designed for removing dandelions and similar deep-rooted weeds, this tool features a long, narrow shaft that reaches deep into the soil to extract the entire root.

8. Hand Weeding Fork

With its sturdy tines, the hand weeding fork is excellent for loosening soil and prying out clumps of weeds, ensuring complete root removal.

9. Weed Torch

For those preferring a chemical-free approach, a weed torch uses propane to generate a flame that destroys weeds. It’s effective for gravel paths and driveways but should be used with caution.

Incorporating these tools into your gardening routine can significantly reduce the time and effort spent on weeding, leading to a healthier and more enjoyable garden.

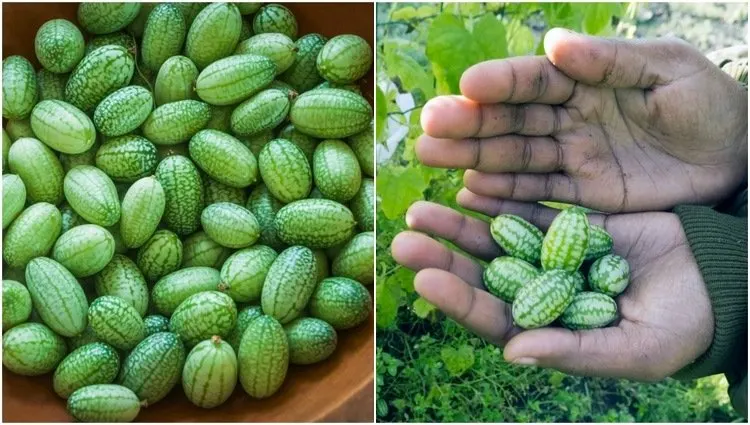
Cucamelons, also known as Mexican sour gherkins or “sandiita” (little watermelon), are grape-sized fruits that resemble miniature watermelons and offer a cucumber-like taste with a hint of lime. These unique fruits have been a staple in Central American diets since pre-Columbian times and are gaining popularity among gardeners for their distinctive appearance and flavor.

Health Benefits of Cucamelons

Despite their small size, cucamelons are packed with nutritional benefits. They are rich in vitamins, minerals, antioxidants, and fiber, while being low in calories. Regular consumption may help lower the risk of heart disease, stroke, and cancer, and their antioxidant properties can aid in combating premature aging.

Steps to Growing Cucamelons

  1. Seed Acquisition: Obtain cucamelon seeds from reputable online sources, as they may not be readily available in local stores.

  2. Climate Considerations: Cucamelons require a long growing season with at least 65 to 75 days of warm, frost-free weather and soil temperatures between 75 and 85 degrees Fahrenheit. In cooler regions, consider growing them in pots that can be moved indoors when temperatures drop below 50 degrees.

  3. Starting Seeds Indoors: Begin seeds indoors about 6-8 weeks before the last expected frost. Plant one seed per pot, approximately half an inch deep, and maintain temperatures around 72 degrees Fahrenheit. Germination can take up to three or four weeks, so patience is key.

  4. Choosing a Planting Location: Select a site with full sun exposure and well-draining, rich soil. Each plant requires at least 12 square inches of space and benefits from a trellis or support structure for climbing.

  5. Transplanting Seedlings: After the danger of frost has passed and soil temperatures are consistently warm, transplant seedlings outdoors, spacing them adequately to allow for growth.

  6. Watering and Maintenance: While cucamelons are drought-tolerant, consistent watering promotes better yields. Ensure the soil remains moist but not waterlogged. Regularly check for pests and diseases, although cucamelons are generally resistant.

  7. Harvesting: Fruits are ready to harvest when they reach the size of a grape and have a firm texture. Regular picking encourages continued production throughout the growing season.

By following these steps, you can successfully cultivate cucamelons and enjoy their unique flavor and numerous health benefits.

Gardening doesn’t always follow the rulebook. Sometimes, the most unexpected tricks—the kind passed down over generations—end up making the biggest difference. These eight “weird” garden remedies might sound strange, but they’ve earned their spot in tool sheds and backyard beds around the world.

1. Bury Banana Peels
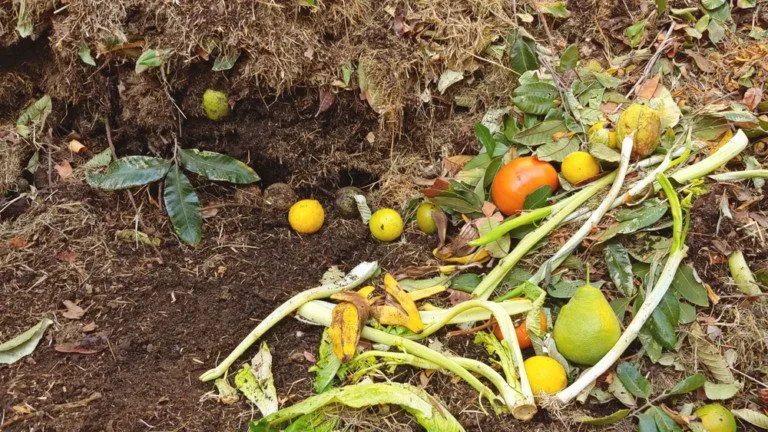
Instead of tossing them in the trash, tuck banana peels into your garden beds. As they break down, they feed the soil with potassium and phosphorus—two nutrients that help flowers bloom and fruits develop strong and sweet.

2. Sprinkle Epsom Salt on Soil
Magnesium sulfate, found in Epsom salt, helps boost growth in tomatoes, peppers, and roses. Just a spoonful around the base of each plant strengthens stems and encourages more blooms.

3. Use Crushed Eggshells for Pest Control
Crushed eggshells not only add calcium to the soil but also act as a physical barrier. Slugs and snails hate crawling over the sharp edges, giving your tender greens a better chance.

4. Water with Coffee Grounds
Used coffee grounds improve soil texture and add nitrogen—a vital nutrient for leafy greens. Just don’t overdo it. Mix into compost or sprinkle lightly around acid-loving plants like blueberries or hydrangeas.

5. Stick Pennies in the Soil to Fight Fungus
Old copper pennies have natural antifungal properties. Push a few into the soil near plants prone to mildew and watch them thrive with fewer disease issues.

6. Spray Plants with Diluted Milk
Yes—milk. Mix one part milk with two parts water and spray it on your plants. It’s surprisingly effective against powdery mildew and can also boost calcium in the soil.

7. Use Hair Clippings as Mulch
Human or pet hair sprinkled around the garden deters rabbits and other nibblers. As a bonus, it decomposes slowly and adds nitrogen as it breaks down.

8. Bury Fish Scraps Beneath Plants
Native gardeners have done it for centuries—burying fish remains beneath crops. It’s a potent, slow-release fertilizer packed with nutrients. Just be sure to bury them deep enough to avoid pests.

Adding a few of these oddball tricks to your gardening routine might feel unconventional—but your plants won’t complain.

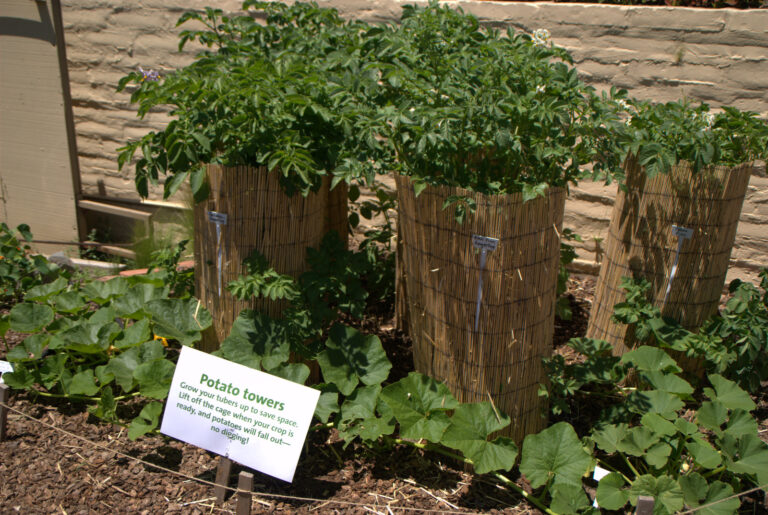
Growing potatoes vertically using a potato tower is an efficient method to maximize yields in limited spaces. This approach allows gardeners to cultivate multiple layers of potatoes within a compact area. Here’s a step-by-step guide to constructing your own potato tower:​

Materials Needed:

  • Container or Structure: Options include a wire mesh cylinder, wooden box, or stacked tires. Ensure it’s at least 2–3 feet tall and wide enough for several layers of potatoes.

  • Soil: High-quality potting soil or compost rich in organic matter.

  • Seed Potatoes: Certified disease-free seed potatoes.

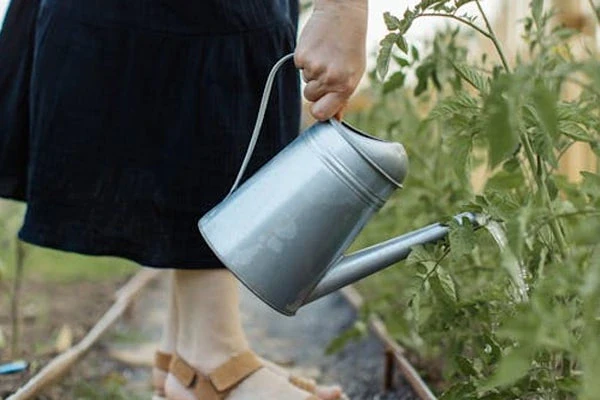
  • Watering Equipment: Watering can or hose for consistent moisture.

  • Fertilizer (Optional): Balanced fertilizer to promote healthy growth.

Step-by-Step Construction:

  1. Select a Location: Choose a sunny spot with at least 6–8 hours of sunlight daily and good drainage.

  2. Prepare the Container:

    • For wire mesh cylinders or wooden boxes, line the bottom with newspaper or landscape fabric to prevent soil loss.

    • If using tires, stack them to the desired height.

  3. Layering Potatoes and Soil:

    • Add 4–6 inches of soil to the bottom of the container.

    • Place seed potatoes evenly on the soil with eyes facing upward.

    • Cover with another layer of soil, leaving about 4 inches of space from the container’s rim.

    • Water thoroughly to moisten the soil.

  4. Add Layers as Plants Grow:

    • When plants reach about 6 inches in height, add more soil, covering all but the top few inches of foliage.

    • Repeat this process until the container is full.

  5. Maintenance:

    • Water regularly to keep the soil consistently moist but not waterlogged.

    • Monitor for pests or diseases and address as needed.

    • Optionally, apply balanced fertilizer to support growth.

  6. Harvesting:

    • Potatoes are typically ready 10–12 weeks after planting.

    • When foliage yellows and dies back, carefully dig around the base to harvest.

Building a potato tower is a practical solution for gardeners with limited space, offering a bountiful harvest through vertical cultivation.

April marks the transition into the heart of the gardening season, presenting an opportune time to prepare and nurture your garden for the months ahead. By focusing on key tasks such as soil preparation, planting, pruning, and pest management, you can establish a robust foundation for a flourishing garden.

1. Prepare Your Soil

Begin by clearing any debris and weeds from your garden beds. Enhance soil fertility and structure by incorporating organic matter like compost or well-rotted manure. Conducting a soil test can provide insights into nutrient levels and pH, allowing for precise amendments to create optimal growing conditions.

2. Start Planting

April is ideal for sowing cool-season crops such as lettuce, spinach, kale, carrots, radishes, and peas, which thrive in the mild temperatures of early spring. Additionally, starting warm-season vegetables like tomatoes, peppers, and cucumbers indoors prepares them for transplanting once the risk of frost has passed. Introducing early-blooming flowers like pansies and violas can also add vibrant color to your garden.

3. Prune and Trim

Pruning is essential for promoting healthy growth and enhancing flowering. In April, focus on removing dead or damaged branches from shrubs and trees. Prune early spring bloomers after they have finished flowering, and trim perennials and ornamental grasses to encourage fresh growth.

4. Mulch for Moisture and Weed Control

Applying a 2–3-inch layer of organic mulch around plants helps retain soil moisture, regulate temperature, and suppress weed growth. Materials such as shredded bark, straw, or compost not only serve these functions but also contribute to soil health as they decompose.

5. Manage Pests Naturally

With the arrival of warmer weather, pests become more active. Regularly inspect plants for signs of infestation and encourage beneficial insects like ladybugs and praying mantises that prey on common pests. Utilizing natural deterrents such as neem oil or insecticidal soap can effectively control pest populations without harming the environment.

6. Water Wisely

Consistent and efficient watering is crucial for plant health. Watering early in the morning reduces evaporation and helps prevent fungal diseases. Implementing a drip irrigation system can provide targeted watering, ensuring that moisture reaches plant roots effectively.

7. Maintain Your Lawn

A well-maintained lawn enhances the overall appearance of your garden. April is an excellent time to aerate compacted soil, reseed bare patches, and apply organic fertilizer to promote lush, healthy grass growth.

8. Set Up Garden Supports

Installing stakes, trellises, or cages for climbing plants like peas, beans, and tomatoes early in the season prevents damage and promotes better air circulation, reducing the risk of disease.

9. Plan for Pollinators

Attracting pollinators such as bees, butterflies, and hummingbirds is vital for a productive garden. Planting nectar-rich flowers like lavender, salvia, and coneflowers supports these beneficial creatures and enhances biodiversity.

10. Enjoy Your Garden

Take time to observe and appreciate the progress in your garden. Engaging with your outdoor space not only provides relaxation but also allows you to notice and address any issues promptly, ensuring a thriving garden throughout the season.

By diligently performing these tasks, you set the stage for a vibrant and productive garden that will bring enjoyment and bountiful harvests in the coming months.

Peonies are cherished for their lush, fragrant blossoms and are a highlight in many gardens. However, to ensure these perennials produce vibrant and abundant flowers, it’s essential to understand their fertilization needs. Recognizing the signs that indicate your peonies require feeding and knowing the correct fertilization techniques can significantly enhance their health and blooming potential.

Signs Your Peonies Need Fertilization:

  • Stunted Growth: If your peonies are not reaching their typical height or appear smaller than usual, it may indicate a nutrient deficiency.

  • Reduced Flowering: A noticeable decrease in the number or size of blooms suggests the plant lacks essential nutrients.

  • Yellowing Leaves: Leaves turning yellow, especially those at the base, can be a sign that the plant is not receiving adequate nourishment.

Importance of Fertilizing Peonies:

Fertilizing replenishes essential nutrients in the soil, promoting robust root development and enhancing flower production. Over time, peonies deplete soil nutrients, making periodic feeding crucial for sustained health and blooming.

Optimal Timing for Fertilization:

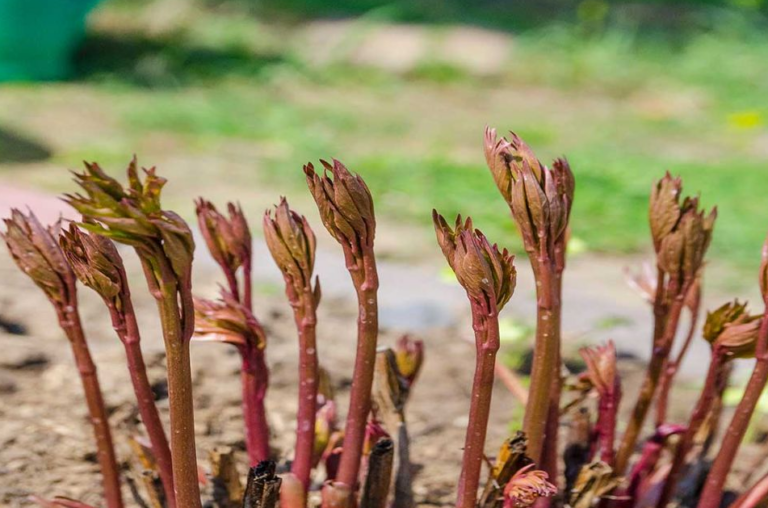
  1. Early Spring: As new shoots emerge, apply a balanced, slow-release fertilizer to support initial growth.

  2. Post-Blooming: After the flowering period, a lighter application helps the plant recover and prepares it for the next season.

Step-by-Step Fertilization Guide:

  1. Clear the Area: Remove debris and mulch from around the base of the plant.

  2. Choose the Right Fertilizer: Opt for a balanced (10-10-10) slow-release granular fertilizer.

  3. Apply Fertilizer: Evenly distribute the fertilizer around the base, avoiding direct contact with stems.

  4. Incorporate into Soil: Gently work the fertilizer into the top inch of soil.

  5. Water Thoroughly: Ensure the area is well-watered to help nutrients reach the roots.

  6. Reapply Mulch: Add a light layer of mulch to conserve moisture and protect roots.

Common Fertilization Mistakes to Avoid:

  • Over-Fertilizing: Excess nutrients can lead to lush foliage with fewer blooms.

  • Late-Season Fertilization: Applying fertilizer late in the season can encourage new growth susceptible to frost damage.

  • Incorrect Application: Placing fertilizer too close to stems can harm the plant; always apply around the drip line.

By observing your peonies for signs of nutrient deficiency and following proper fertilization practices, you can enhance their growth and enjoy a more bountiful display of blooms.

Peace lilies (Spathiphyllum) are cherished for their lush foliage and elegant white blooms. However, coaxing them to flower can sometimes be challenging. Here are 11 effective methods to help your peace lily thrive and produce its signature blossoms:

  1. Provide Adequate Lighting

    Position your peace lily in bright, indirect sunlight. While they can tolerate low light, sufficient indirect light promotes blooming. Avoid direct sunlight, which can scorch the leaves.

  2. Maintain Consistent Watering

    Keep the soil consistently moist but not waterlogged. Allow the top inch of soil to dry out between waterings to prevent root rot.

  3. Ensure Proper Humidity

    Peace lilies thrive in humid environments. Increase humidity by misting the leaves, placing a water-filled tray with pebbles beneath the pot, or using a humidifier.

  4. Fertilize Moderately

    During the growing season, feed your peace lily with a balanced, water-soluble fertilizer diluted to half-strength every 6 to 8 weeks. Over-fertilizing can harm the plant and inhibit blooming.

  5. Repot When Necessary

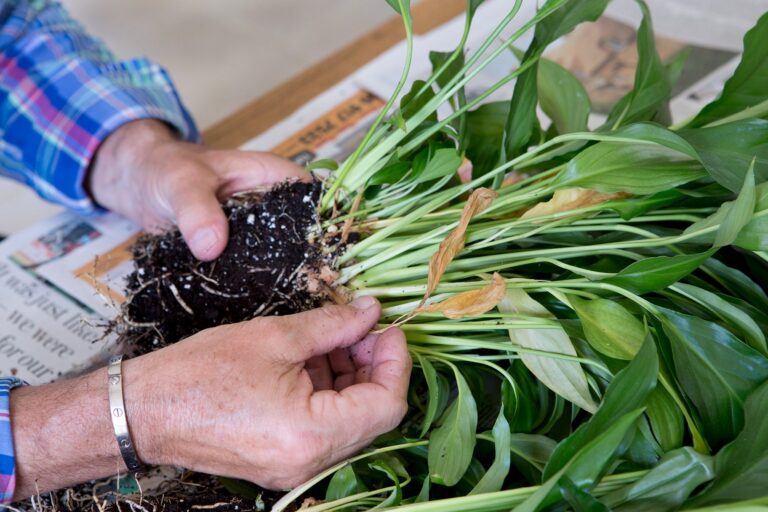
    If roots are visible through drainage holes or the soil dries out quickly, it may be time to repot your peace lily into a slightly larger container to encourage growth and flowering.

  6. Maintain Stable Temperatures

    Keep your peace lily in temperatures between 65–80°F (18–27°C). Protect it from drafts and sudden temperature changes, which can stress the plant and hinder blooming.

  7. Prune Spent Blooms and Yellow Leaves

    Regularly remove faded flowers and yellowing leaves to redirect the plant’s energy toward new growth and potential blooms.

  8. Use Well-Draining Soil

    Plant your peace lily in a well-draining, peat-based potting mix to ensure proper aeration and moisture control.

  9. Choose the Right Pot Size

    A pot that’s too large can lead to excessive soil moisture, while one that’s too small may restrict growth. Select a pot that allows for some growth but isn’t excessively large.

  10. Apply Bloom-Boosting Fertilizer

    Consider using a fertilizer higher in phosphorus (the middle number in fertilizer ratios) to promote flowering. Apply sparingly and follow package instructions to avoid over-fertilization.

  11. Exercise Patience

    Even with optimal care, peace lilies may take time to bloom. Consistent, attentive care will eventually lead to flowering.

By implementing these strategies, you can create an environment conducive to your peace lily’s health and encourage it to produce its beautiful blooms.

Gardening is a fulfilling endeavor that not only enhances the beauty of your environment but also offers fresh produce and a deep sense of accomplishment. To help both novice and seasoned gardeners optimize their efforts, here are 20 ingenious gardening hacks designed to boost your garden’s health, save time, and promote sustainability:

1. Utilize Eggshells as Natural Fertilizer

Crushed eggshells are rich in calcium, an essential nutrient that helps prevent blossom end rot in crops like tomatoes and peppers. Simply rinse, dry, crush, and sprinkle them around the base of your plants.

2. Enrich Soil with Coffee Grounds

Used coffee grounds provide nitrogen, improve soil structure, and attract beneficial earthworms. Sprinkle them on the soil surface or mix into your compost, but use sparingly to avoid increasing soil acidity.

3. Employ Vinegar as a Natural Weed Killer

White vinegar’s acetic acid content makes it effective against young weeds. Apply directly to weed leaves on a sunny day, taking care to avoid contact with desirable plants.

4. Boost Plant Health with Epsom Salt

Containing magnesium and sulfur, Epsom salt aids in photosynthesis and nutrient absorption. Dissolve a tablespoon in a gallon of water and water your plants monthly to enhance color and yield.

5. Regrow Plants from Kitchen Scraps

Reduce waste by regrowing vegetables like green onions, lettuce, and celery from their bases. Place the cut ends in water until roots develop, then transplant to soil.

6. Practice Companion Planting for Pest Control

Grow certain plants together to enhance growth and deter pests. For example, marigolds repel nematodes when planted with tomatoes, and basil improves tomato flavor while deterring flies.

7. Apply Mulch to Retain Moisture

A 2-3 inch layer of organic mulch, such as straw or wood chips, conserves soil moisture, suppresses weeds, and adds nutrients as it decomposes. Keep mulch away from plant stems to prevent rot.

8. Create a DIY Compost Bin

Recycle kitchen and garden waste into nutrient-rich compost using a simple bin made from a large plastic container or wooden pallets. Alternate layers of green and brown materials, turning regularly to speed decomposition.

9. Use Baking Soda for Sweeter Tomatoes

Sprinkling a small amount of baking soda around tomato plants can reduce soil acidity, potentially leading to sweeter fruit. Use cautiously to avoid over-alkalizing the soil.

10. Collect Rainwater for Irrigation

Harvesting rainwater is eco-friendly and provides chemical-free hydration for your garden. Set up a rain barrel under a downspout to collect and store water for dry periods.

11. Build a Simple Drip Irrigation System

Deliver water directly to plant roots by creating a drip system with a garden hose punctured with small holes. Lay the hose along garden rows and connect to a water source for efficient watering.

12. Attract Pollinators with Native Flowers

Plant native flowers that bloom at various times to draw bees and butterflies, essential for pollination and a healthy garden ecosystem.

13. Fertilize with Banana Peels

Rich in potassium and phosphorus, banana peels can be chopped and buried near plants or soaked in water to create a nutrient-rich tea, benefiting flowering plants and fruit trees.

14. Make Natural Pesticides with Neem Oil

Neem oil controls various garden pests without harming beneficial insects. Mix with water and a few drops of dish soap, then spray on affected plants to manage issues like aphids and spider mites.

15. Suppress Weeds with Newspaper

Lay several layers of newspaper around plants and cover with mulch to block sunlight, preventing weed growth while allowing water and nutrients to penetrate.

16. Grow Herbs Indoors Year-Round

Cultivate herbs like basil, mint, and parsley indoors on a sunny windowsill using small pots with good drainage and quality potting mix. Regular trimming encourages bushy growth.

17. Create Raised Beds for Better Drainage

Raised beds improve drainage, prevent soil compaction, and warm up earlier in the spring, extending the growing season. Construct using untreated wood, bricks, or concrete blocks, and fill with a soil-compost mix.

18. Use Fish Emulsion for Plant Growth

High in nitrogen, phosphorus, and potassium, fish emulsion provides a quick nutrient boost. Dilute with water as directed and apply every few weeks during the growing season.

19. Protect Plants with DIY Cloches

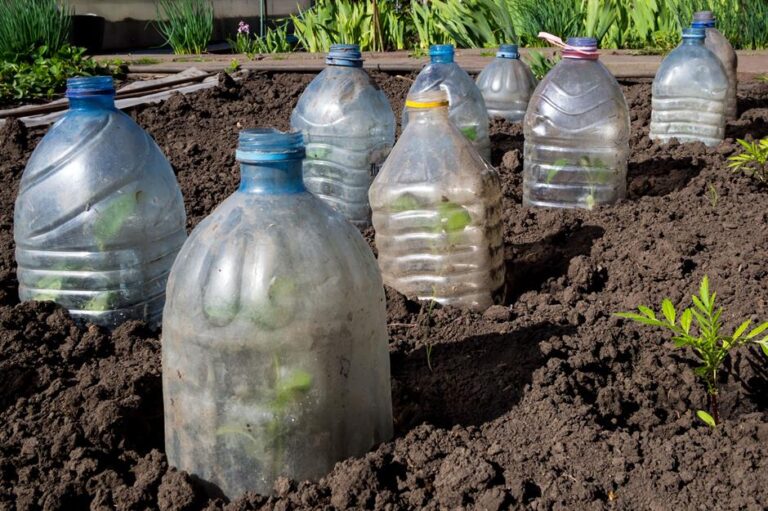
Shield plants from cold and pests by covering them with homemade cloches made from plastic bottles with the bottoms cut off, creating a mini greenhouse effect.

20. Store Seeds Properly for Future Planting

Keep seeds viable by storing them in a cool, dry place in airtight containers. Label with plant name and collection date; some seeds benefit from refrigeration to extend viability.

Implementing these hacks can lead to a more productive, sustainable, and enjoyable gardening experience, allowing you to cultivate a thriving garden with greater ease and efficiency.

Growing pineapples at home is a fulfilling endeavor that brings a touch of the tropics to your garden or indoor space. While the process requires patience, the steps are straightforward and accessible for gardeners of all levels. Here’s a detailed guide to help you cultivate your own pineapple plant:

Materials Needed:

  • A ripe pineapple

  • Sharp knife

  • Cutting board

  • Pot or container with drainage holes

  • Well-draining potting soil (such as a cactus mix)

  • Sunny location or grow lights

  • Water

Step 1: Select a Healthy Pineapple

Choose a ripe pineapple with vibrant green leaves and a firm texture. Avoid fruits with browning leaves or signs of decay.

Step 2: Remove the Crown

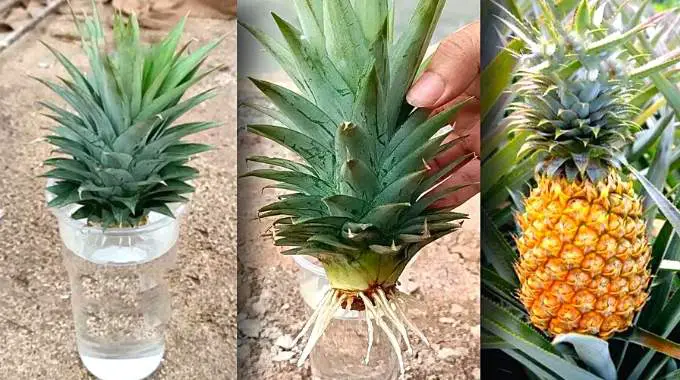
Lay the pineapple on its side on a cutting board. Using a sharp knife, slice off the leafy crown about an inch below the leaves to include a portion of the stem.

Step 3: Prepare the Crown

Carefully trim away any remaining fruit flesh from the base of the crown to prevent rot. Peel off some of the lower leaves to expose about an inch of the stem.

Step 4: Cure the Crown

Place the prepared crown in a dry, well-ventilated area for a few days to allow the cut end to heal. This step reduces the risk of rotting when planted.

Step 5: Root the Crown (Optional)

While not mandatory, you can encourage root development by placing the cured crown in a glass of water, submerging just the base. Change the water every few days. Once roots reach about 2-3 inches, proceed to planting.

Step 6: Plant the Crown

Fill a pot with well-draining potting soil. Create a small hole in the center and plant the crown, ensuring the exposed stem is buried while the leaves remain above the soil. Gently firm the soil around the base.

Step 7: Watering

After planting, water the soil lightly to settle it around the roots. Moving forward, keep the soil consistently moist but not waterlogged. Overwatering can lead to root rot.

Step 8: Provide Adequate Light

Place the pot in a location that receives at least 6-8 hours of bright, indirect sunlight daily. If natural light is insufficient, supplement with grow lights to ensure healthy growth.

Step 9: Fertilize Periodically

During the growing season (spring and summer), feed the plant with a balanced, slow-release fertilizer every 6-8 weeks. Avoid over-fertilizing, as this can harm the plant.

Step 10: Exercise Patience

Pineapple plants are slow growers. It may take 2-3 years before the plant produces fruit. During this period, continue regular care, and monitor for any signs of pests or diseases.

By following these steps, you can successfully grow a pineapple plant at home, adding a tropical flair to your space and eventually enjoying homegrown fruit.

Growing an Amla tree (Indian Gooseberry) from cuttings is a rewarding endeavor that allows you to cultivate this beneficial plant in your own garden. This guide outlines a straightforward method to propagate Amla trees using cuttings, ensuring successful growth and development.

1. Selecting the Right Cutting

  • Timing: The optimal period to take cuttings is during the plant’s dormant season, typically from mid-autumn to late winter.

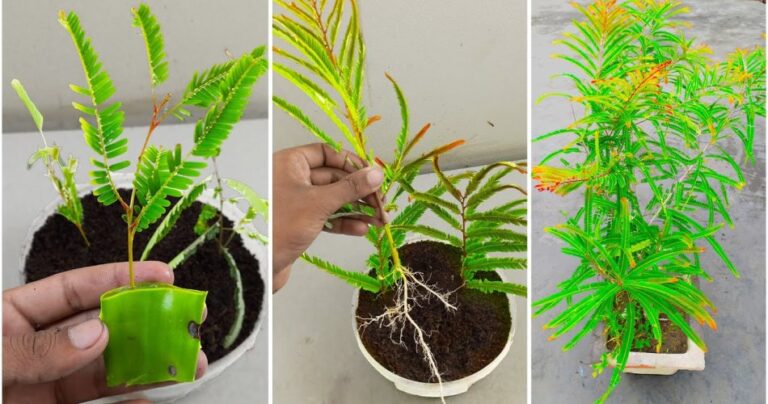
  • Choosing the Cutting: Select a healthy, one-year-old shoot approximately 6 inches (15 cm) in length. Ensure the cutting has multiple nodes, as these are crucial for root development.

2. Preparing the Cutting

  • Trimming: Make a clean cut just below a node at the base and a slanted cut above a node at the top.

  • Wounding: Gently scrape the bark off the bottom inch of the cutting to expose the cambium layer, promoting root initiation

  • Rooting Hormone: Dip the wounded end into a rooting hormone to enhance root development.

3. Planting the Cutting

  • Soil Preparation: Use well-draining, sandy or loamy soil with a pH between 5.5 and 7.0.

  • Planting Depth: Insert the cutting into the soil, ensuring that at least two nodes are buried beneath the surface.

  • Spacing: If planting multiple cuttings, space them adequately to allow for growth and air circulation.

4. Creating the Ideal Environment

  • Location: Place the potted cutting in a location that receives bright, indirect sunlight.

  • Humidity: To maintain humidity, cover the cutting with a clear plastic bag or dome, ensuring it doesn’t touch the leaves.

  • Temperature: Maintain a consistent temperature between 68°F to 77°F (20°C to 25°C) to encourage rooting.

5. Ongoing Care

  • Watering: Keep the soil consistently moist but not waterlogged. Overwatering can lead to root rot.

  • Monitoring: Regularly check for signs of new growth, indicating successful rooting.

  • Transplanting: Once the cutting has established a robust root system and shows significant growth, it can be transplanted to a larger pot or directly into the ground.

By following these steps, you can successfully propagate an Amla tree from cuttings, adding this valuable plant to your garden.