Category

Gardening

Category

A thriving garden begins with well-prepared beds. Whether cultivating flowers, vegetables, or herbs, dedicating time to ready your soil and planting areas can significantly enhance your garden’s productivity. Here’s a comprehensive guide to ensure your garden beds are primed for a successful growing season.

1. Assess and Plan Your Garden

Start by evaluating your garden space. Consider factors like sunlight exposure, soil type, drainage, and previous plantings. Thoughtful planning, including crop rotation, helps prevent soil nutrient depletion and reduces disease buildup.

2. Clear Out Debris

Remove any debris, dead leaves, and remnants from past seasons. This tidying process prevents diseases and pests from overwintering and prepares a clean slate for new growth.

3. Test and Amend Your Soil

Conduct a soil test to determine pH levels and nutrient content. Based on the results, amend your soil with necessary nutrients. Incorporating organic matter, such as compost or well-rotted manure, enhances soil structure and fertility.

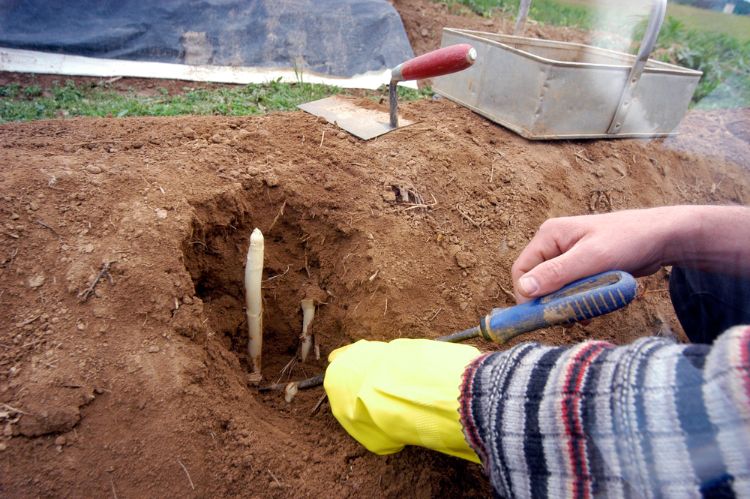
4. Loosen and Aerate the Soil

Gently till or fork the soil to loosen it, improving aeration and drainage. Avoid over-tilling, as it can disrupt beneficial microorganisms and soil structure.

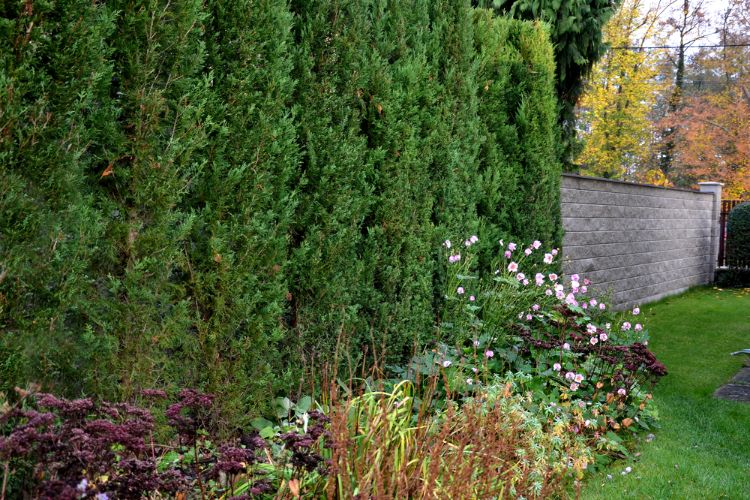
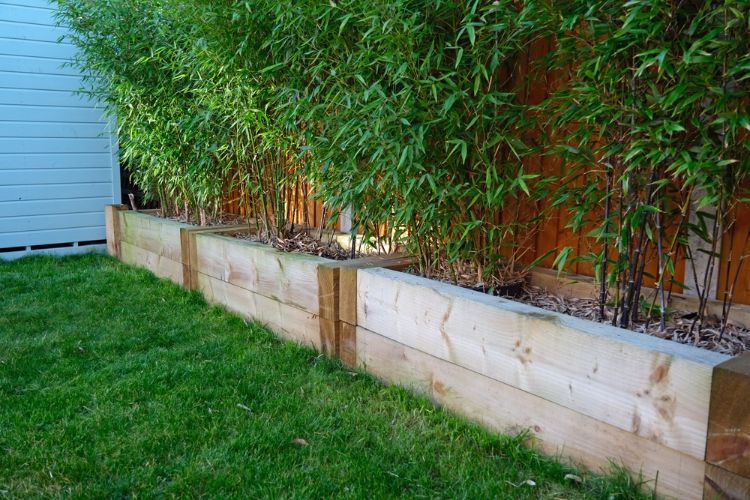
5. Define and Prepare Planting Beds

Establish clear boundaries for your planting areas. Raised beds can offer better drainage and soil control. Ensure pathways are designated to minimize soil compaction in planting zones.

6. Mulch for Moisture Retention and Weed Control

Apply a layer of mulch to retain soil moisture, regulate temperature, and suppress weed growth. Organic mulches like straw, bark, or shredded leaves also contribute to soil health as they decompose.

7. Set Up Irrigation

Ensure your garden has an efficient watering system. Drip irrigation or soaker hoses deliver water directly to plant roots, conserving moisture and reducing disease risk.

8. Protect Against Pests and Wildlife

Implement measures to safeguard your garden from pests and wildlife. This can include installing physical barriers like fences or using natural deterrents to keep unwanted visitors at bay.

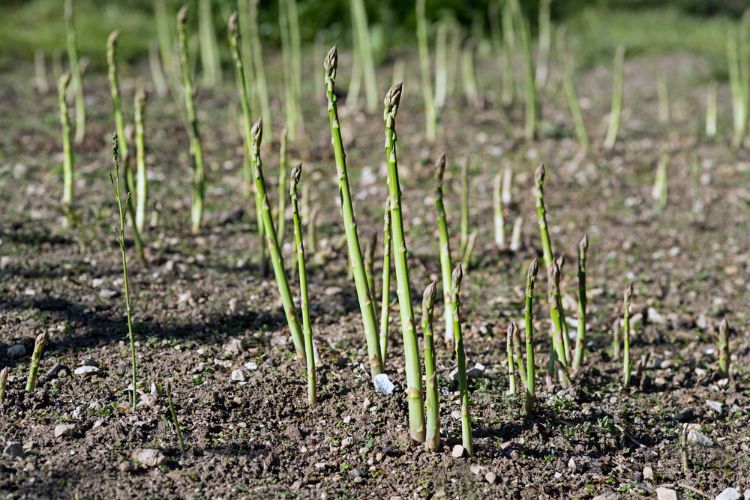
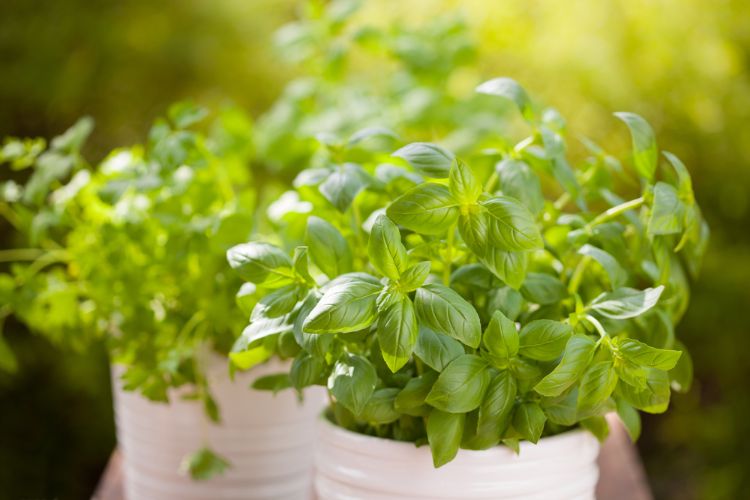
9. Start Seeds or Transplants

Depending on your climate and plant choices, begin sowing seeds indoors or purchase healthy transplants. Harden off seedlings before moving them outdoors to acclimate them to the external environment.

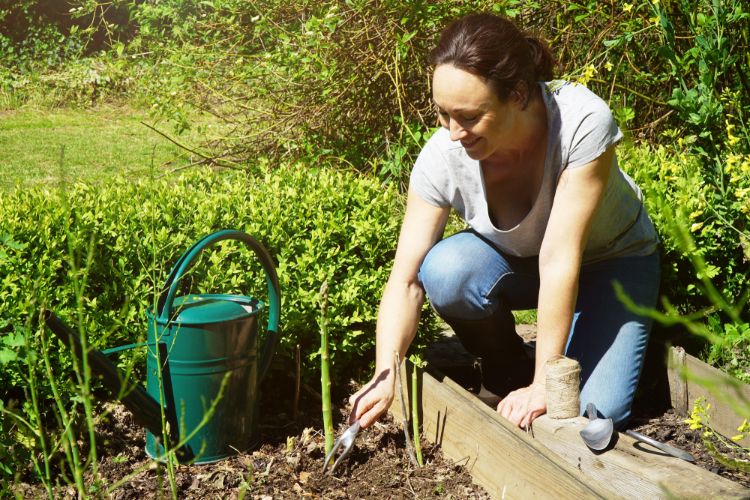
10. Maintain and Monitor

Regularly inspect your garden for signs of pests, diseases, or nutrient deficiencies. Consistent maintenance, including watering, weeding, and pruning, will support robust plant growth throughout the season.

By following these steps, you’ll create a solid foundation for a vibrant and productive garden.

As winter transitions to spring, gardeners have the opportunity to kickstart their growing season by planting hardy crops that flourish in cooler temperatures. March is an ideal time to sow these resilient varieties, ensuring an early and bountiful harvest. Here are some top choices for cold-weather planting:​

1. Kale

Kale stands out as a robust leafy green, capable of withstanding frost and even developing enhanced flavor in cooler conditions. Sow seeds directly into well-draining soil, spacing them about 12 inches apart. Maintain consistent moisture, and within a few weeks, you’ll have tender leaves perfect for salads and sautés.

2. Radishes

Radishes are a fast-growing crop that thrives in early spring’s cooler temperatures. Sow seeds directly into the ground, and within 3-4 weeks, you’ll have crisp, peppery roots ready for harvest. For a continuous supply, plant new seeds every couple of weeks.

3. Spinach

Spinach is a nutrient-packed green that excels in cooler temperatures. Sow seeds directly into the soil, ensuring they receive full sun to partial shade. Regular watering and well-drained soil will keep your spinach growing steadily.

4. Peas

Peas love cool weather, making March an excellent time to plant them. Both snap peas and shelling peas can be sown directly into the soil, and they will quickly establish before the warmer weather arrives. Providing a trellis or support structure will encourage upward growth, making harvesting easier and reducing the risk of disease.

5. Carrots

Carrots grow best in early spring when temperatures are still cool. Choose a loose, sandy soil to allow the roots to grow straight and long. Be patient, as carrots take a bit longer to mature—typically around 60-80 days.

6. Lettuce

Lettuce is one of the easiest and fastest-growing leafy greens, making it a top choice for early spring planting. It thrives in cool temperatures and can be harvested multiple times through cut-and-come-again methods. Romaine, butterhead, and leaf lettuce varieties are excellent choices for a March planting, as they can tolerate light frosts.

Tips for Successful Cold-Weather Planting

  • Soil Preparation: Ensure your soil is well-draining and enriched with organic matter to provide essential nutrients.

  • Monitor Weather Conditions: Keep an eye on the forecast for unexpected frosts. Be prepared to cover young plants with frost cloths or row covers to protect them.

  • Watering: While cooler temperatures mean less evaporation, it’s still crucial to keep the soil consistently moist, especially for germinating seeds.

  • Succession Planting: Stagger your plantings every couple of weeks to ensure a continuous harvest throughout the season.

By selecting the right crops and following these guidelines, you can make the most of the early spring conditions and enjoy a productive start to your gardening year.

Integrating black plastic into your gardening practices can offer numerous benefits, enhancing plant growth and simplifying maintenance. Here are eight effective ways to utilize black plastic in your garden:​

1. Warm the Soil for Early Planting

Covering your garden beds with black plastic in early spring absorbs sunlight, raising soil temperatures by up to five degrees Fahrenheit. This warmth allows for planting seeds and transplants several weeks earlier than usual, giving your crops a head start.

2. Accelerate Seed Germination

The increased soil temperature and retained humidity under black plastic create an ideal environment for seeds to germinate more quickly. Consistent warmth and moisture promote faster sprouting and robust early growth.

3. Retain Soil Moisture

Black plastic acts as a barrier, significantly reducing moisture loss from the soil. This retention means less frequent watering is required, conserving water and ensuring plants have consistent access to the moisture they need.

4. Maintain Warmer Soil at Night

During cooler nights, the heat absorbed by black plastic during the day helps keep soil temperatures stable. This warmth protects plant roots from temperature fluctuations that could hinder growth or cause damage.

5. Extend the Growing Season into Fall

By keeping soil temperatures elevated as the weather cools, black plastic allows gardeners to prolong the growing season. Crops can continue to thrive later into the fall, maximizing yield and garden productivity.

6. Suppress Weed Growth

Laying black plastic over soil blocks sunlight from reaching weed seeds, preventing their germination. Any weeds that do manage to sprout are deprived of light, inhibiting their growth and reducing competition for nutrients with your plants.

7. Prevent Soil Erosion

Black plastic helps control soil erosion by shielding the ground from heavy rains and irrigation runoff. It slows water movement, allowing it to seep into the soil rather than washing it away, thus preserving soil structure and fertility.

8. Sterilize Soil to Eliminate Pests and Diseases

A technique known as solarization involves covering soil with black plastic to trap heat, raising temperatures to levels that kill harmful pathogens, pests, and weed seeds. This natural sterilization process reduces the need for chemical treatments, promoting a healthier garden ecosystem

Incorporating black plastic into your gardening routine can lead to healthier plants, reduced maintenance, and increased yields. By leveraging these methods, gardeners can create a more efficient and productive growing environment.

Incorporating recycled materials into your gardening routine not only benefits the environment but also enhances your garden’s health and productivity. Newspapers, often abundant in households, can be repurposed in several practical ways to support your gardening efforts. Here are six innovative methods to utilize newspapers in your garden:​

1. Line Raised Garden Beds

When constructing raised garden beds, placing a layer of newspaper at the bottom can effectively suppress weeds. This barrier prevents unwanted plants from growing up into your garden soil, reducing competition for nutrients and water. Over time, the newspaper decomposes, enriching the soil with organic matter.

2. Weed Suppression Under Mulch

To enhance weed control, lay down sheets of newspaper over the soil before applying mulch. This additional layer blocks sunlight, inhibiting weed seed germination. As the newspaper breaks down, it contributes to soil health, making this method both effective and environmentally friendly.

3. Prevent Soil Loss in Containers

In container gardening, drainage holes are essential to prevent waterlogging, but they can also lead to soil loss. Lining the bottom of pots with newspaper allows water to drain while keeping the soil intact. This simple step helps maintain the proper soil level and prevents messes on your patio or balcony.

4. Create Temporary Pathways

For areas in your garden prone to becoming muddy, layering newspapers can serve as a temporary stepping surface. The paper absorbs excess moisture and provides a cleaner path. At the end of the season, the decomposed newspaper can be worked into the soil, adding organic content.

5. Prepare Garden Beds for New Seasons

After harvesting and clearing out plants, cover the tilled soil with a layer of newspaper. This practice protects the soil from erosion and suppresses weed growth during the off-season. By spring, the partially decomposed newspaper can be easily integrated into the soil, enriching it for the next planting cycle.

6. Balance Compost Piles

Maintaining the right carbon-to-nitrogen ratio is crucial for efficient composting. Shredded newspaper serves as an excellent source of carbon (the “brown” material) and can be added to compost piles to balance nitrogen-rich components like food scraps and grass clippings. This balance accelerates decomposition, resulting in rich, fertile compost for your garden.

By creatively repurposing newspapers, you not only reduce waste but also enhance your garden’s vitality. These simple yet effective techniques contribute to sustainable gardening practices that benefit both your plants and the environment.

Embarking on a gardening journey often begins with the simple act of planting seeds. To enhance the success rate and vigor of your seedlings, consider the practice of soaking seeds prior to planting. This method offers several benefits that can lead to a more robust and fruitful garden. Here are seven compelling reasons to incorporate seed soaking into your gardening routine:​

  1. Initiates Germination

    Soaking seeds in warm water for a period—typically between 12 to 24 hours—signals them to break dormancy and commence germination. This moisture exposure mimics natural environmental cues, encouraging seeds to sprout.

  2. Removes Germination Inhibitors

    Certain seeds possess natural chemical inhibitors on their outer coatings that delay germination. Soaking helps dissolve these substances, facilitating a quicker and more uniform sprouting process.

  3. Softens the Seed Coat

    Water absorption during soaking softens the hard outer shell of seeds, making it easier for the emerging embryo to push through. This is particularly beneficial for seeds with tough exteriors, such as beans, peas, and squash.

  4. Reduces Germination Time

    By providing seeds with the moisture they need upfront, soaking can significantly shorten the time between planting and sprouting. This is especially advantageous when starting the growing season later than planned.

  5. Enhances Seed Swelling

    As seeds soak, they absorb water and swell, which can help to end dormancy and kickstart the internal processes necessary for germination.

  6. Improves Uniformity of Germination

    Soaking seeds can lead to more consistent and simultaneous sprouting, resulting in uniform plant development and a more organized garden layout.

  7. Prepares Seeds for Scarification

    For seeds with particularly hard coats, soaking can be a precursor to scarification—a process where the seed coat is physically altered to allow moisture penetration—further aiding in successful germination.

Guidelines for Effective Seed Soaking:

  • Duration: Most seeds benefit from soaking for 12 to 24 hours. Avoid exceeding 48 hours, as prolonged soaking can lead to seed rot.

  • Water Temperature: Use lukewarm water to facilitate optimal absorption without causing thermal stress to the seeds.

  • Seed Selection: Larger seeds with hard coats, such as beans, peas, and squash, gain the most from soaking. Smaller seeds with thin shells, like lettuce or celery, may not require this step and can be more challenging to handle when wet.

By integrating seed soaking into your planting regimen, you can promote healthier seedlings and potentially achieve a more abundant harvest.

Often dismissed as mere weeds, dandelions are, in fact, versatile plants offering a multitude of benefits. From nutritional value to creative uses, here are ten compelling reasons to appreciate and utilize dandelion flowers:

Natural Lawn Maintenance

  1. Removing dandelions by hand is an eco-friendly way to manage your lawn without resorting to chemicals. This approach safeguards both the environment and the health of your household and pets.

  2. Nutrient-Rich Edibles

    Dandelion greens are rich in vitamins A, C, and K, and provide minerals such as iron and calcium. Incorporating these greens into your diet can enhance overall nutrition.

  3. Aesthetic Appeal

    Their bright yellow blossoms can add a cheerful touch to your home. A simple bouquet of dandelions can brighten any room and bring a bit of nature indoors.

  4. Root Harvesting for Beverages

    Dandelion roots can be harvested, roasted, and ground to create a caffeine-free coffee alternative. This practice offers a unique and flavorful beverage option.

  5. Pickling Potential

    Dandelion buds can be pickled to create a caper-like condiment. This adds a unique flavor to various dishes and is a creative way to utilize the plant.

  6. Homemade Dandelion Wine

    The flowers can be used to make dandelion wine, a traditional beverage enjoyed in various cultures. This process involves fermenting the blossoms to create a unique and flavorful drink.

  7. Edible Blooms

    Dandelion flowers are edible and can be used in various culinary applications. They can be added to salads, pancakes, or fritters, providing a mild, sweet flavor.

  8. Infused Oils for Massage

    Infusing dandelion flowers in oil can create a soothing massage oil. This homemade remedy is believed to help relax muscles and alleviate minor aches.

  9. Culinary Creativity with Pancakes

    Incorporating dandelion petals into pancake batter can add a subtle sweetness and a splash of color. This is a fun and inventive way to enhance a traditional breakfast.

  10. Dandelion-Infused Vinegar

Soaking dandelion flowers in vinegar can create a flavorful infusion. This dandelion-infused vinegar can be used in salad dressings and marinades, adding a unique twist to your culinary creations.

Embracing dandelions opens up a world of nutritional, medicinal, and creative possibilities. Next time you spot these golden blooms, consider the myriad ways they can enrich your life.

Creating a secluded and tranquil outdoor space is achievable by incorporating fast-growing shrubs into your garden. These plants not only provide privacy but also add beauty and structure to your landscape. Here are ten excellent options to consider:

  1. Leyland Cypress

    A popular choice for privacy screens, the Leyland cypress is a fast-growing evergreen conifer that can add 3 to 5 feet per year. Its dense foliage forms a solid barrier, making it ideal for large spaces where privacy is needed.

  1. Cherry Laurel

    Cherry laurel is a robust, versatile, and fast-growing shrub. It can grow up to 3 feet per year, making it suitable for creating a thick, evergreen hedge. This shrub thrives in various soil types and is drought-tolerant once established.

  1. Holly

    Holly bushes offer dense foliage and, in some varieties, produce bright red berries, adding visual interest to your garden. They can grow up to 50 feet tall, providing an effective tall privacy screen. Additionally, their spiky leaves add an extra layer of security.

  1. Pyracantha (Firethorn)

    Pyracantha is an evergreen shrub known for its vibrant orange berries in the fall. It works well as a standalone bush or as part of a hedge, providing both privacy and a splash of color.

  1. Bamboo

    Bamboo is renowned for its rapid growth, making it an excellent choice for creating a natural privacy screen. Certain species can grow quickly and form a dense screen, making them a popular choice for privacy hedges. However, it’s important to choose a clumping variety of bamboo rather than a running variety to prevent it from becoming invasive.

  2. Lilac

    Lilac shrubs are known for their fragrant, colorful blooms in the spring. They can grow quickly, providing a beautiful and aromatic privacy barrier.

  3. Forsythia

    Forsythia is a deciduous shrub that bursts into bright yellow blooms in early spring. It’s a super fast grower that looks lovely in groups or when used in a mixed border, and it’s deer-resistant.

  4. Hydrangea

    Hydrangeas are versatile shrubs that can stand alone or work as climbing plants. They offer beautiful, extravagant blooms and can be either evergreen or deciduous, depending on the variety.

  5. Arborvitae

    Arborvitae is a popular evergreen shrub for privacy hedges due to its dense foliage and fast growth rate. It can grow up to 20 feet tall and 10 feet wide, making it an effective screen for large properties.

  6. Dappled Willow

    Also known as tri-color willow, this shrub has lovely pink, white, and pale green variegations with an elegant weeping or rounded form. New growth emerges with an eye-catching pink hue, adding a unique aesthetic to your garden.

Incorporating these fast-growing shrubs into your garden can quickly enhance privacy while adding beauty and diversity to your outdoor space.

Asparagus is a perennial vegetable that, with proper care, can provide fresh, flavorful harvests for 20 years or more. Establishing a thriving asparagus bed requires patience and attention, but the long-term rewards are well worth the effort. Here are nine essential tips to help you cultivate a productive asparagus patch:​

  1. Select the Ideal Location

    Choose a sunny spot in your garden where the asparagus can grow undisturbed for years. Ensure the area has well-draining soil to prevent root rot, as asparagus roots are susceptible to waterlogged conditions. The soil should be loosened to a depth of 12 to 15 inches to accommodate the deep root system.

  1. Prepare the Soil

    Asparagus thrives in neutral to slightly acidic soil with a pH between 6.5 and 7.5. Conduct a soil test to determine the pH and nutrient levels. Amend the soil with compost or aged manure to improve fertility and structure. Adding phosphorus-rich amendments like bone meal can promote strong root development.

  2. Choose Between Seeds and Crowns

    Decide whether to start your asparagus from seeds or crowns (dormant root systems). Growing from seeds is cost-effective but requires an additional year before harvesting. Starting with one-year-old crowns accelerates the process, allowing for earlier yields.

  1. Planting Seeds Indoors

    If opting for seeds, begin indoors in late winter or early spring. Soak the seeds in water for a few hours to enhance germination. Plant them in pots filled with sterile soil, covering lightly with sand. Maintain a temperature between 70°F and 85°F, and ensure the seedlings receive ample light.

  2. Transplanting Seedlings

    After approximately three months, once the risk of frost has passed, transplant the seedlings outdoors. Space them about 18 inches apart in rows that are 4 feet apart. Water them lightly once per week, allowing them to grow throughout the summer. In the fall, trim back the foliage to prepare for the next growing season.

  3. Planting Crowns

    For those choosing crowns, early spring is the ideal time for planting. Dig trenches 6 to 8 inches deep and 12 to 18 inches wide. Create small mounds of loose soil at the bottom of the trench, spacing them 18 inches apart. Place each crown atop a mound, spreading the roots down the sides, and cover with 2 inches of soil. As the spears grow, gradually fill in the trench with soil, leaving the tips exposed.

  1. Watering and Maintenance

    Keep the asparagus bed consistently moist but not waterlogged. Watering once a week is typically sufficient. Mulching around the plants can help retain moisture and suppress weeds, which is crucial since asparagus does not compete well with weeds. Regularly remove any invasive plants to maintain a healthy bed.

  2. Fertilizing

    Asparagus is a heavy feeder. Apply a balanced fertilizer in the spring as spears begin to emerge and again after the final harvest in early summer. Top-dressing with compost or aged manure annually can also provide essential nutrients.

  3. Harvesting Guidelines

    Patience is key with asparagus. Refrain from harvesting any spears during the first two years to allow the plants to establish a robust root system. In the third year, harvest spears that are about 8 inches tall by snapping or cutting them at ground level. Limit the harvest period to 4 weeks initially, extending it in subsequent years as the plants mature.

By following these guidelines, you can establish an asparagus bed that yields delicious and nutritious spears for decades, making it a worthwhile addition to any home garden.

If summer evenings in your backyard are constantly interrupted by swarms of flies or buzzing mosquitoes, your garden might be missing a powerful line of defense: pest-repelling plants. Certain plants naturally give off scents and oils that send bugs packing—no chemicals, sprays, or swatters needed.

Here are eight beautiful and functional plants that do more than look pretty — they help keep unwanted pests at bay.

1. Basil
This fragrant herb doesn’t just liven up your pasta. Basil gives off a strong scent that most bugs hate, especially flies and mosquitoes. Plant it in pots around patios or near doors to keep the air fresh and the pests far away.

2. Lavender
Soft purple flowers and a calming aroma make lavender a garden favorite — but bugs can’t stand it. It’s great for borders, entryways, and sunny spots where you want a bit of beauty and bug protection.

3. Rosemary
With its woody stems and pungent smell, rosemary acts like a natural shield against mosquitoes. It also thrives in containers, making it perfect for small spaces or balconies.

4. Marigolds
These bold, orange and yellow blooms aren’t just eye-catching. They’re natural pest deterrents that can protect surrounding plants from bugs. Add them to veggie patches or flower beds for a splash of color and a barrier to bugs.

5. Lemongrass
This tall, grassy plant gives off a clean citrus scent that mosquitoes really don’t like. It loves warm climates and full sun, making it an excellent border plant that doubles as a bug repellent.

6. Chrysanthemums
These bright blooms pack a punch when it comes to pest control. They naturally help deter insects like ticks, fleas, and flying pests. Plus, they’re easy to grow and add a festive touch to gardens and porches.

7. Garlic
Known for its strong smell, garlic does more than add flavor in the kitchen. It acts like a natural shield in the garden, especially when planted near veggies that are often attacked by bugs.

8. Catnip
While your feline friends may love it, bugs definitely do not. Catnip is highly effective at keeping mosquitoes away. Grow it in containers to manage its spread while enjoying its unexpected benefits.

Adding these plants to your yard, patio, or balcony doesn’t just make your space more vibrant — it creates a natural pest-control system that works around the clock. Less buzzing, fewer bites, and more time to relax outside.

Cultivating cucumbers at home offers a satisfying way to enjoy fresh produce. To enhance your harvest and promote healthy plant growth, implementing effective support structures is essential. Here are nine creative trellis and support ideas to consider:

  1. Utilize Existing Fences

Transform your garden fence into a sturdy support for cucumber vines. Whether it’s chain-link or wooden, fences provide a natural backbone, and the climbing plants can beautify the structure by concealing less attractive areas.

  1. Install Wall Trellises

For gardens bordered by walls, affix wooden trellises or arrange bamboo sticks against the surface. This setup encourages vertical growth and can be customized to fit your space.

  1. Construct Vertical Trellises

Maximize limited garden space by installing a vertical trellis in the center of your planting beds. Use materials like reclaimed wood or metal to build a structure that supports upward growth, facilitating better air circulation and sunlight exposure.

  1. Design Tent Trellises

Create a tent-shaped trellis by joining two panels at the top to form a triangle. This design offers robust support for heavy cucumbers and can be positioned over existing beds to optimize space.

  1. Repurpose Household Items

Give new life to old items like stepladders or wooden pallets by converting them into cucumber supports. Simply lean them against a wall or fence to provide a ready-made climbing structure.

  1. Assemble Teepee Trellises

For individual plants, construct a teepee-shaped support using several sturdy sticks tied together at the top. This simple structure offers ample support and adds a rustic charm to your garden.

  1. Build Arch Trellises

Arch trellises, typically made from wire, allow cucumbers to grow along a curved path closer to the ground. Customize the size and length to suit your garden’s layout and aesthetic.

  1. Implement Twine Supports

In a pinch, create a network of support by tying lengths of twine or string above your cucumber plants. This method is quick, cost-effective, and surprisingly strong, guiding vines as they reach upward.

  1. Opt for Ground Growth

If space permits, allow cucumber plants to sprawl along the ground without vertical support. Ensure ample room between plants to prevent overcrowding and promote healthy development.

By exploring these diverse trellis and support options, you can enhance your cucumber harvest, improve plant health, and add visual interest to your garden.